Here at UK Gaming Computers we like writing articles about all the cool stuff we come across, for some reason we’ve never written an article about a build we have done for a customer. This is about to change with this article, we’ll go through an introduction to the build, what the customer wanted, additional options we offered to accommodate the customer’s needs, loop design, problems we had along the way, benchmarks and lots of pictures!
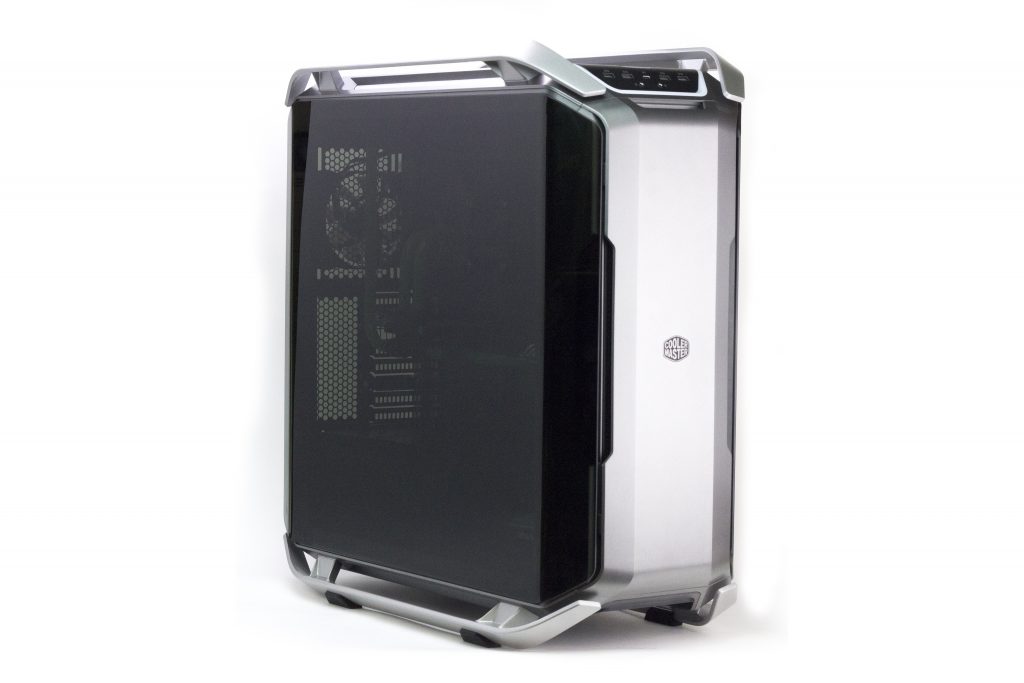
So, let’s get started with the introduction. I’ve named this build the “Green with Envy” (you’ll figure out why when you see what it looks like) a full watercooled build in a CoolerMaster C700P using XSPC, Liquid.cool & EKWB watercooling components. Being cooled is an overclocked Intel i7 8700k and an Nvidia GeForce GTX EVGA 1080Ti 11GB.
 Here’s the full spec list.
Components
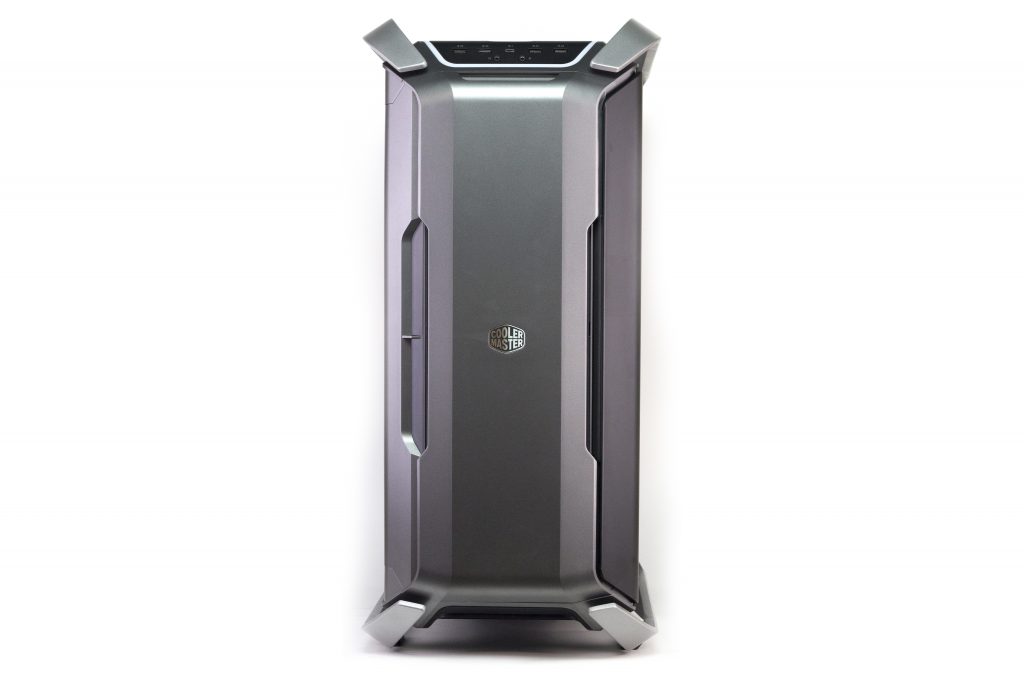
Case - CoolerMaster C700P RGB Glass
Power Supply - Corsair RM750x 750W
Processor - Intel Core i7 8700k w/ Extreme Overclock (5Ghz @ 1.35v)
RAM - 32GB Corsair Vengeance LPX DDR4 2400Mhz (2x16GB)
Motherboard - Asus ROG STRIX Z370-F Gaming
Graphics Card - EVGA 1080Ti SC Black Edition
SSD - 500GB Samsung 850 Evo
HDD - 4TB Seagate Barracuda 5900RPM
Watercooling
Radiator - XSPC EX360
CPU Water Block - Liquid.Cool Strike One
GPU Water Block - EKWB EK-FC 1080Ti FE w/ EK-FC Black Backplate
Pump/ Reservoir - XSPC D5 Photon 170 v2
Tubing - XSPC PETG Rigid Clear 14/10mm
Coolant - Liquid.Cool Vivid Green Premixed
Fittings - XSPC Compression Fitting V2 Matte Black
Modifications
Internal RGB Lighting Kit
Underglow RGB Lighting Kit
4 x Game Max Windforce RGB LED Fans
Green cable ties
Black cable braiding
Black braided SATA cables
Phanteks Individually Braided Cable Extensions Black
These are the final specs that were decided after a lengthy discussion with the customer to work out exactly what they wanted, they wanted a high end system with a focus on aesthetics to play games like Fallout 76 (when it’s released), Far Cry 5 and modded Witcher 3 at 4k so the 1080Ti was the obvious choice, he also wanted it to be VR capable and be able to manage some light photo editing, which is why we decided to go for the i7 8700k and 32GB of RAM.
The aesthetics of the build were really important to the customer, he originally wanted a soft tubed system with an internal RGB lighting kit but after I showed him what a hard tubed build could look like there was no going back! He also wanted it to light up like a Christmas tree, so we added in RGB led strips inside and underneath the case, RGB fans and with some cutting, wire stripping and soldering managed to get them all synced up with the impressive RGB controlled built in to the CoolerMaster C700P. The customer also wanted green accents to the build, I suggested green cable ties and Liquid.Cool Vivid Green fluid, which he was happy to go with. At this point I had a very good vision of what he wanted, so suggested few more things including black cable braid and braided SATA cables to really bring the build together. I also suggested a couple of upgrades that aren’t listed on our website that I thought he would want, these were a black PSU braid kit from Phanteks and a nice black backplate from EK to cover up the unsightly PCB (unfortunately the standard EVGA backplate wouldn’t fit), the customer agreed that these would put the finishing touches to the build and was happy to go ahead with them.
Here’s the full spec list.
Components
Case - CoolerMaster C700P RGB Glass
Power Supply - Corsair RM750x 750W
Processor - Intel Core i7 8700k w/ Extreme Overclock (5Ghz @ 1.35v)
RAM - 32GB Corsair Vengeance LPX DDR4 2400Mhz (2x16GB)
Motherboard - Asus ROG STRIX Z370-F Gaming
Graphics Card - EVGA 1080Ti SC Black Edition
SSD - 500GB Samsung 850 Evo
HDD - 4TB Seagate Barracuda 5900RPM
Watercooling
Radiator - XSPC EX360
CPU Water Block - Liquid.Cool Strike One
GPU Water Block - EKWB EK-FC 1080Ti FE w/ EK-FC Black Backplate
Pump/ Reservoir - XSPC D5 Photon 170 v2
Tubing - XSPC PETG Rigid Clear 14/10mm
Coolant - Liquid.Cool Vivid Green Premixed
Fittings - XSPC Compression Fitting V2 Matte Black
Modifications
Internal RGB Lighting Kit
Underglow RGB Lighting Kit
4 x Game Max Windforce RGB LED Fans
Green cable ties
Black cable braiding
Black braided SATA cables
Phanteks Individually Braided Cable Extensions Black
These are the final specs that were decided after a lengthy discussion with the customer to work out exactly what they wanted, they wanted a high end system with a focus on aesthetics to play games like Fallout 76 (when it’s released), Far Cry 5 and modded Witcher 3 at 4k so the 1080Ti was the obvious choice, he also wanted it to be VR capable and be able to manage some light photo editing, which is why we decided to go for the i7 8700k and 32GB of RAM.
The aesthetics of the build were really important to the customer, he originally wanted a soft tubed system with an internal RGB lighting kit but after I showed him what a hard tubed build could look like there was no going back! He also wanted it to light up like a Christmas tree, so we added in RGB led strips inside and underneath the case, RGB fans and with some cutting, wire stripping and soldering managed to get them all synced up with the impressive RGB controlled built in to the CoolerMaster C700P. The customer also wanted green accents to the build, I suggested green cable ties and Liquid.Cool Vivid Green fluid, which he was happy to go with. At this point I had a very good vision of what he wanted, so suggested few more things including black cable braid and braided SATA cables to really bring the build together. I also suggested a couple of upgrades that aren’t listed on our website that I thought he would want, these were a black PSU braid kit from Phanteks and a nice black backplate from EK to cover up the unsightly PCB (unfortunately the standard EVGA backplate wouldn’t fit), the customer agreed that these would put the finishing touches to the build and was happy to go ahead with them.
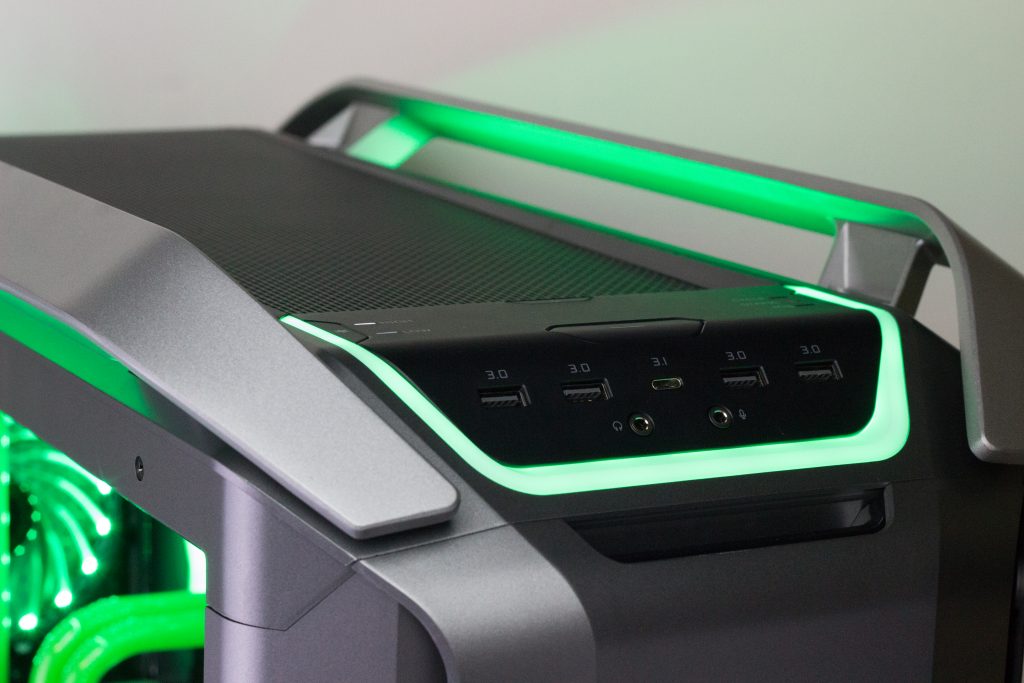
 The order was placed, and it was time to begin. From the start of the build I knew I wanted to re-wire all the lighting in the system to all be synced together, but wasn’t sure how I wanted to do it. After some looking over the case I figured it out, I could install everything on the controller that comes with the case! This controller is actually very good, it has enough connections to fit everything we need onto, and good options to control it too. It takes an input from a regular RGB header from the motherboard, which gives you the option to use the (somewhat limited) pre-programmed lighting modes, or the motherboard control with the click of a button! Well done to CoolerMaster for not only including an RGB controller (something they’ve previously struggled with), but a really good one at that! With everything eventually connected up to the controller with a good amount of wire cutting, wire stripping and soldering, it was all together and worked perfectly, and because we used the case controller we also got the external case lighting synced up too! The last thing you want is 4 different controllers controlling 4 different sets of lighting. It really did light up like a Christmas tree, which was exactly what the customer wanted. While the case was taken apart during the lighting installation, I braided all the case cables using various sizes of black cable braid.
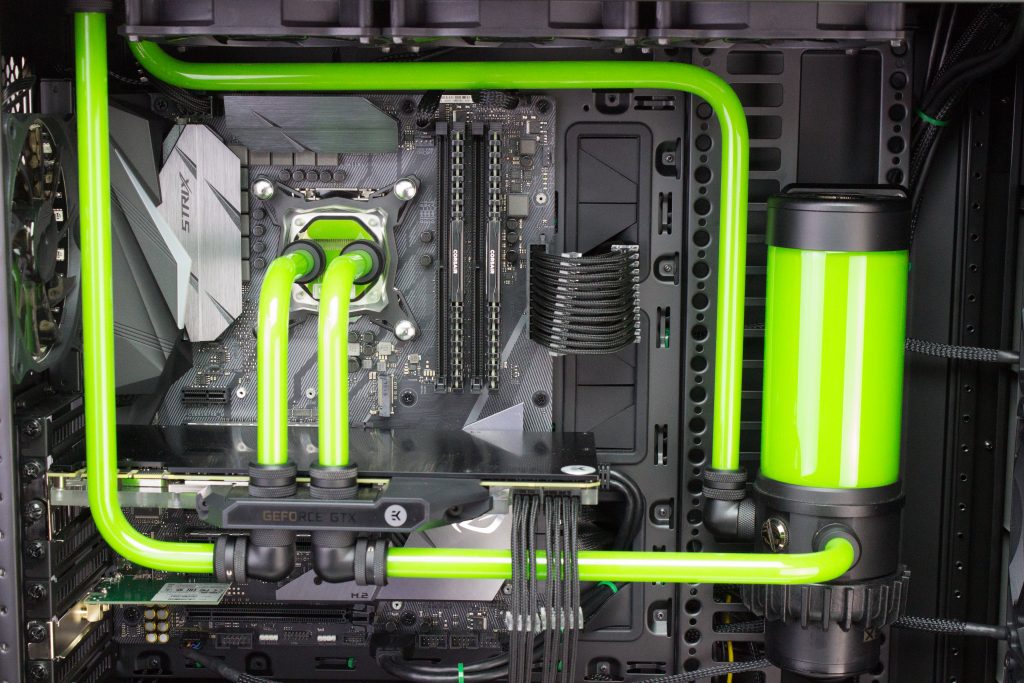
 Once all the modifications had been made to the case, it was time to start the actual build. Not much to write about here as it was only a case of installing the components into the case and connecting up all the cables. After this I installed the waterblock and backplate onto the graphics card, and, after some loop design, installed all of the watercooling components. I decided to have the radiator in the roof for optimal performance with the ports on the left side, and go with a parallel loop design which I thought would give that "look" that the customer craved. I made sure the outlets on the pump were at the exact same level as the return tube that came from the GPU to ensure a perfectly straight tube run.
The choice to go with a parallel loop instead of a conventional serial layout was quite an easy one, originally I was going to have the loop order as Pump > CPU > Radiator > GPU > Pump so did the far left tube that loops into the bottom of the GPU first, after seeing how good it looked and the angle to run two tubes from the GPU to the CPU block was perfect, I decided that I’d do it that way.
Once all the modifications had been made to the case, it was time to start the actual build. Not much to write about here as it was only a case of installing the components into the case and connecting up all the cables. After this I installed the waterblock and backplate onto the graphics card, and, after some loop design, installed all of the watercooling components. I decided to have the radiator in the roof for optimal performance with the ports on the left side, and go with a parallel loop design which I thought would give that "look" that the customer craved. I made sure the outlets on the pump were at the exact same level as the return tube that came from the GPU to ensure a perfectly straight tube run.
The choice to go with a parallel loop instead of a conventional serial layout was quite an easy one, originally I was going to have the loop order as Pump > CPU > Radiator > GPU > Pump so did the far left tube that loops into the bottom of the GPU first, after seeing how good it looked and the angle to run two tubes from the GPU to the CPU block was perfect, I decided that I’d do it that way.
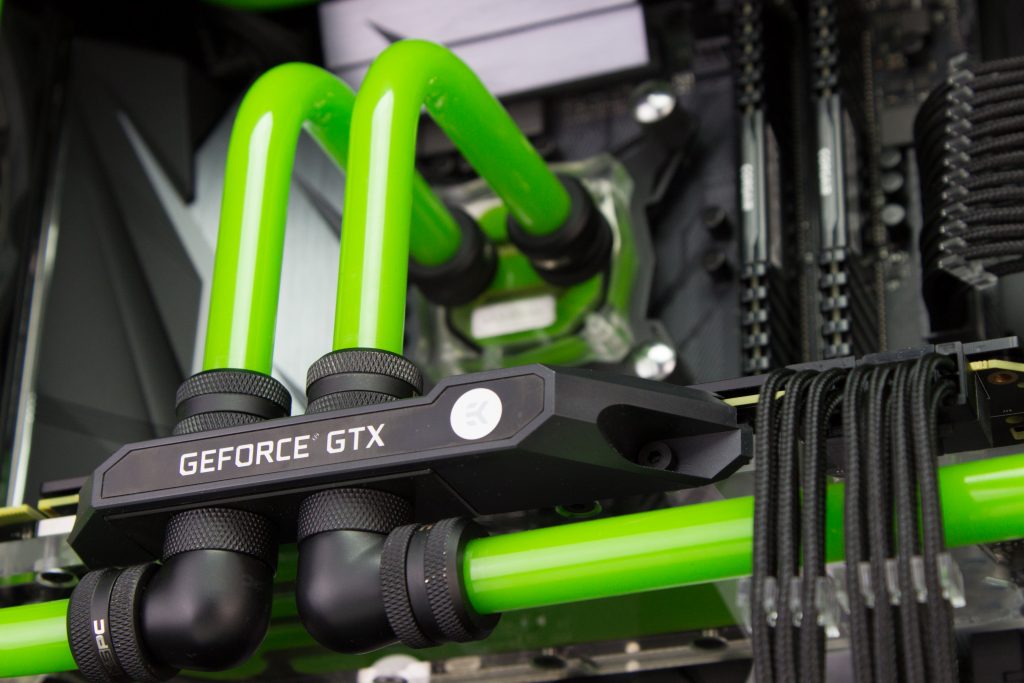 Most people will look at a parallel loop and say it’s wrong and inefficient, however it actually works very well, especially in this case. If we look at how the Liquid.cool fluid is running, it’s being cooled by the radiator then being split between the CPU and GPU waterblocks perfectly which is ideal as the fluid temperature will be the same when entering both of the blocks, in a serial layout it’d be going through the CPU block before the GPU block or vice versa causing higher temperatures in the second component.
The rest of the tubing fell into place after the previously mentioned runs were installed, the only tricky one was the tube that runs along the top as it’s very tight and barely clears the fans on one side, and the VRM heatsink on the other. I am very happy with how the tubing turned out, I like the way it’s framing itself with all of the perfect geometry. After the tubing was complete, I sorted out the cable management making sure the cable combs were on perfect, and double checking everything was in the correct place and looked as it should.
Most people will look at a parallel loop and say it’s wrong and inefficient, however it actually works very well, especially in this case. If we look at how the Liquid.cool fluid is running, it’s being cooled by the radiator then being split between the CPU and GPU waterblocks perfectly which is ideal as the fluid temperature will be the same when entering both of the blocks, in a serial layout it’d be going through the CPU block before the GPU block or vice versa causing higher temperatures in the second component.
The rest of the tubing fell into place after the previously mentioned runs were installed, the only tricky one was the tube that runs along the top as it’s very tight and barely clears the fans on one side, and the VRM heatsink on the other. I am very happy with how the tubing turned out, I like the way it’s framing itself with all of the perfect geometry. After the tubing was complete, I sorted out the cable management making sure the cable combs were on perfect, and double checking everything was in the correct place and looked as it should.
 It was now time to fill the beast we’d created, at this point I joked with a colleague that the build had gone so perfectly it was bound to leak. We got our cameras and lights all set up and began to fill up the reservoir. We were about to turn the pump on and one of the 90 degree fittings under the GPU started dripping bright green fluid. Luckily this wasn’t too hard to fix as the loop wasn’t completely full, we were able to turn the computer completely upside-down and replace the fitting without making any mess. Now everything was good, we filled up the reservoir and turned on the pump and it looked fantastic. Luckily we filmed it so you can see how great it was too;
[youtube https://www.youtube.com/watch?v=p5-7__SSHPE]
We leak test all of our watercooled builds for at least 24 hours to ensure that if it does leak it doesn’t damage anything, this went flawlessly without any further leaks so we turned the PC on and began our extensive testing.
Testing went flawlessly until we hit a bit of a hurdle when we needed to overclock the CPU, it wouldn’t even hit 4.9GHz at 1.35v! We decided we would replace the processor which isn’t an easy job without draining the loop, especially when you’re using rigid tubing. Trust us, don’t try this at home. We replaced the processor with another 8700k from stock and went to work overclocking it. This one did 5.0GHz happily at 1.35v with no AVX offset, that's better.
The “Green with Envy” build performs just as well as it looks, in Cinebench R15 CPU Test it gets a score of 1610 which is very impressive for an 8700k. On 3DMark Time Spy it scored 9943. On a 20 minute run on Furmark the GPU peaked at only 48°C with an average of 45°C. We also tested with Prime95 Blend, which saw an impressive 61°C average over 10 minutes. The final test we ran was the full 24 hour overclock test in Aida64 with CPU & FPU enabled which is an AVX load, over the full 24 hours the processor averaged at 81°C with a max of 89°C.
Overall I am very happy with how this turned out, and I’m certain the customer will be more than satisfied with the build. We put a lot of time into it to make sure everything was perfect, but looking at the end result every minute was worth it. This is the first build that really lent itself to being a parallel loop but considering how good it looks and how well it performs, I’m certain it will be something we try to incorporate more.
Now for what you're all here for, the final video and pictures. I couldn't choose what ones to put in the article so have them all!
[youtube https://www.youtube.com/watch?v=IVqLiR0nBBQ]
[gallery gss="0" columns="1" size="large" ids="236,235,234,233,232,231,230,227,226,225,355,353,350,345"]
It was now time to fill the beast we’d created, at this point I joked with a colleague that the build had gone so perfectly it was bound to leak. We got our cameras and lights all set up and began to fill up the reservoir. We were about to turn the pump on and one of the 90 degree fittings under the GPU started dripping bright green fluid. Luckily this wasn’t too hard to fix as the loop wasn’t completely full, we were able to turn the computer completely upside-down and replace the fitting without making any mess. Now everything was good, we filled up the reservoir and turned on the pump and it looked fantastic. Luckily we filmed it so you can see how great it was too;
[youtube https://www.youtube.com/watch?v=p5-7__SSHPE]
We leak test all of our watercooled builds for at least 24 hours to ensure that if it does leak it doesn’t damage anything, this went flawlessly without any further leaks so we turned the PC on and began our extensive testing.
Testing went flawlessly until we hit a bit of a hurdle when we needed to overclock the CPU, it wouldn’t even hit 4.9GHz at 1.35v! We decided we would replace the processor which isn’t an easy job without draining the loop, especially when you’re using rigid tubing. Trust us, don’t try this at home. We replaced the processor with another 8700k from stock and went to work overclocking it. This one did 5.0GHz happily at 1.35v with no AVX offset, that's better.
The “Green with Envy” build performs just as well as it looks, in Cinebench R15 CPU Test it gets a score of 1610 which is very impressive for an 8700k. On 3DMark Time Spy it scored 9943. On a 20 minute run on Furmark the GPU peaked at only 48°C with an average of 45°C. We also tested with Prime95 Blend, which saw an impressive 61°C average over 10 minutes. The final test we ran was the full 24 hour overclock test in Aida64 with CPU & FPU enabled which is an AVX load, over the full 24 hours the processor averaged at 81°C with a max of 89°C.
Overall I am very happy with how this turned out, and I’m certain the customer will be more than satisfied with the build. We put a lot of time into it to make sure everything was perfect, but looking at the end result every minute was worth it. This is the first build that really lent itself to being a parallel loop but considering how good it looks and how well it performs, I’m certain it will be something we try to incorporate more.
Now for what you're all here for, the final video and pictures. I couldn't choose what ones to put in the article so have them all!
[youtube https://www.youtube.com/watch?v=IVqLiR0nBBQ]
[gallery gss="0" columns="1" size="large" ids="236,235,234,233,232,231,230,227,226,225,355,353,350,345"]
Here’s the full spec list.
Components
Case - CoolerMaster C700P RGB Glass
Power Supply - Corsair RM750x 750W
Processor - Intel Core i7 8700k w/ Extreme Overclock (5Ghz @ 1.35v)
RAM - 32GB Corsair Vengeance LPX DDR4 2400Mhz (2x16GB)
Motherboard - Asus ROG STRIX Z370-F Gaming
Graphics Card - EVGA 1080Ti SC Black Edition
SSD - 500GB Samsung 850 Evo
HDD - 4TB Seagate Barracuda 5900RPM
Watercooling
Radiator - XSPC EX360
CPU Water Block - Liquid.Cool Strike One
GPU Water Block - EKWB EK-FC 1080Ti FE w/ EK-FC Black Backplate
Pump/ Reservoir - XSPC D5 Photon 170 v2
Tubing - XSPC PETG Rigid Clear 14/10mm
Coolant - Liquid.Cool Vivid Green Premixed
Fittings - XSPC Compression Fitting V2 Matte Black
Modifications
Internal RGB Lighting Kit
Underglow RGB Lighting Kit
4 x Game Max Windforce RGB LED Fans
Green cable ties
Black cable braiding
Black braided SATA cables
Phanteks Individually Braided Cable Extensions Black
These are the final specs that were decided after a lengthy discussion with the customer to work out exactly what they wanted, they wanted a high end system with a focus on aesthetics to play games like Fallout 76 (when it’s released), Far Cry 5 and modded Witcher 3 at 4k so the 1080Ti was the obvious choice, he also wanted it to be VR capable and be able to manage some light photo editing, which is why we decided to go for the i7 8700k and 32GB of RAM.
The aesthetics of the build were really important to the customer, he originally wanted a soft tubed system with an internal RGB lighting kit but after I showed him what a hard tubed build could look like there was no going back! He also wanted it to light up like a Christmas tree, so we added in RGB led strips inside and underneath the case, RGB fans and with some cutting, wire stripping and soldering managed to get them all synced up with the impressive RGB controlled built in to the CoolerMaster C700P. The customer also wanted green accents to the build, I suggested green cable ties and Liquid.Cool Vivid Green fluid, which he was happy to go with. At this point I had a very good vision of what he wanted, so suggested few more things including black cable braid and braided SATA cables to really bring the build together. I also suggested a couple of upgrades that aren’t listed on our website that I thought he would want, these were a black PSU braid kit from Phanteks and a nice black backplate from EK to cover up the unsightly PCB (unfortunately the standard EVGA backplate wouldn’t fit), the customer agreed that these would put the finishing touches to the build and was happy to go ahead with them.
The order was placed, and it was time to begin. From the start of the build I knew I wanted to re-wire all the lighting in the system to all be synced together, but wasn’t sure how I wanted to do it. After some looking over the case I figured it out, I could install everything on the controller that comes with the case! This controller is actually very good, it has enough connections to fit everything we need onto, and good options to control it too. It takes an input from a regular RGB header from the motherboard, which gives you the option to use the (somewhat limited) pre-programmed lighting modes, or the motherboard control with the click of a button! Well done to CoolerMaster for not only including an RGB controller (something they’ve previously struggled with), but a really good one at that! With everything eventually connected up to the controller with a good amount of wire cutting, wire stripping and soldering, it was all together and worked perfectly, and because we used the case controller we also got the external case lighting synced up too! The last thing you want is 4 different controllers controlling 4 different sets of lighting. It really did light up like a Christmas tree, which was exactly what the customer wanted. While the case was taken apart during the lighting installation, I braided all the case cables using various sizes of black cable braid.
Once all the modifications had been made to the case, it was time to start the actual build. Not much to write about here as it was only a case of installing the components into the case and connecting up all the cables. After this I installed the waterblock and backplate onto the graphics card, and, after some loop design, installed all of the watercooling components. I decided to have the radiator in the roof for optimal performance with the ports on the left side, and go with a parallel loop design which I thought would give that "look" that the customer craved. I made sure the outlets on the pump were at the exact same level as the return tube that came from the GPU to ensure a perfectly straight tube run.
The choice to go with a parallel loop instead of a conventional serial layout was quite an easy one, originally I was going to have the loop order as Pump > CPU > Radiator > GPU > Pump so did the far left tube that loops into the bottom of the GPU first, after seeing how good it looked and the angle to run two tubes from the GPU to the CPU block was perfect, I decided that I’d do it that way.
Most people will look at a parallel loop and say it’s wrong and inefficient, however it actually works very well, especially in this case. If we look at how the Liquid.cool fluid is running, it’s being cooled by the radiator then being split between the CPU and GPU waterblocks perfectly which is ideal as the fluid temperature will be the same when entering both of the blocks, in a serial layout it’d be going through the CPU block before the GPU block or vice versa causing higher temperatures in the second component.
The rest of the tubing fell into place after the previously mentioned runs were installed, the only tricky one was the tube that runs along the top as it’s very tight and barely clears the fans on one side, and the VRM heatsink on the other. I am very happy with how the tubing turned out, I like the way it’s framing itself with all of the perfect geometry. After the tubing was complete, I sorted out the cable management making sure the cable combs were on perfect, and double checking everything was in the correct place and looked as it should.
It was now time to fill the beast we’d created, at this point I joked with a colleague that the build had gone so perfectly it was bound to leak. We got our cameras and lights all set up and began to fill up the reservoir. We were about to turn the pump on and one of the 90 degree fittings under the GPU started dripping bright green fluid. Luckily this wasn’t too hard to fix as the loop wasn’t completely full, we were able to turn the computer completely upside-down and replace the fitting without making any mess. Now everything was good, we filled up the reservoir and turned on the pump and it looked fantastic. Luckily we filmed it so you can see how great it was too;
[youtube https://www.youtube.com/watch?v=p5-7__SSHPE]
We leak test all of our watercooled builds for at least 24 hours to ensure that if it does leak it doesn’t damage anything, this went flawlessly without any further leaks so we turned the PC on and began our extensive testing.
Testing went flawlessly until we hit a bit of a hurdle when we needed to overclock the CPU, it wouldn’t even hit 4.9GHz at 1.35v! We decided we would replace the processor which isn’t an easy job without draining the loop, especially when you’re using rigid tubing. Trust us, don’t try this at home. We replaced the processor with another 8700k from stock and went to work overclocking it. This one did 5.0GHz happily at 1.35v with no AVX offset, that's better.
The “Green with Envy” build performs just as well as it looks, in Cinebench R15 CPU Test it gets a score of 1610 which is very impressive for an 8700k. On 3DMark Time Spy it scored 9943. On a 20 minute run on Furmark the GPU peaked at only 48°C with an average of 45°C. We also tested with Prime95 Blend, which saw an impressive 61°C average over 10 minutes. The final test we ran was the full 24 hour overclock test in Aida64 with CPU & FPU enabled which is an AVX load, over the full 24 hours the processor averaged at 81°C with a max of 89°C.
Overall I am very happy with how this turned out, and I’m certain the customer will be more than satisfied with the build. We put a lot of time into it to make sure everything was perfect, but looking at the end result every minute was worth it. This is the first build that really lent itself to being a parallel loop but considering how good it looks and how well it performs, I’m certain it will be something we try to incorporate more.
Now for what you're all here for, the final video and pictures. I couldn't choose what ones to put in the article so have them all!
[youtube https://www.youtube.com/watch?v=IVqLiR0nBBQ]
[gallery gss="0" columns="1" size="large" ids="236,235,234,233,232,231,230,227,226,225,355,353,350,345"]