1 – Setting the boot device
To start you need to set your Optical Drive as the initial boot device on your PC. This is done via the BIOS, which can be accessed by turning on your PC and waiting for the operator logo to appear. You will then be shown one or more options, one of which will be the key to press to enter the BIOS, which is usually the del/delete key. Once in the BIOS you will need to navigate to the boot options and select the boot device priority, you can then select your Optical Drive as the initial boot device. Save your settings and exit the BIOS.
Many systems have the optical drive as the default boot device anyway so you can normally skip to stage 2 without having to do this but if you insert your disk and the PC does what its always done then its not trying to boot from the optical drive.
2 – Insert the Windows 8.1 Disk
Once the PC has rebooted, insert the Windows 8.1 disk into your optical drive. After the operator logo disappears you should be prompted to PRESS ANY KEY TO BOOT FROM YOUR CD OR DVD DRIVE, press any key and windows will begin to load files to your PC.
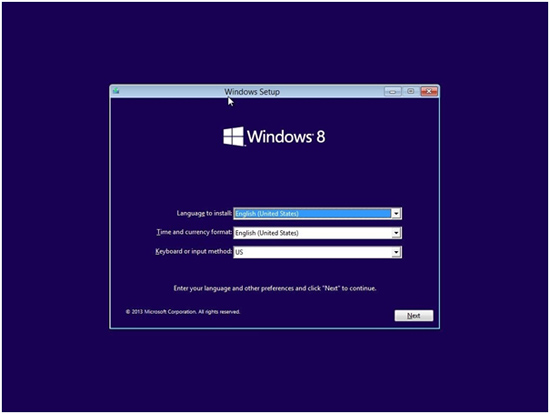
3 – Regional Options
Once the files have been loaded, you will be asked to select the language to install & time and currency format, which should relate to the region you are in, for example - English (United Kingdom). You will also need to select the relevant keyboard or input method again this should relate to the region you are in, for example – UK.
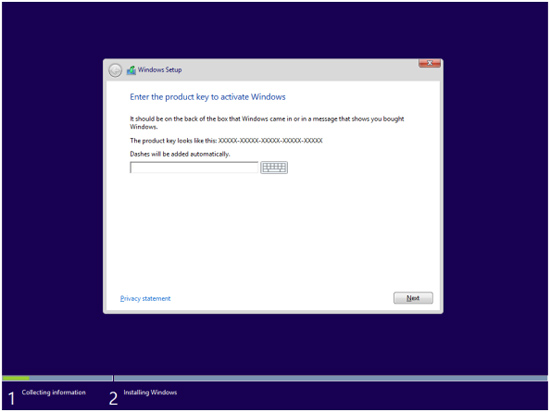
4 – Product Key
This is quite self-explanatory, enter the Windows 8.1 Product key from your installation pack and click Next. If your PC was supplied with an operating system from us then your licence key is fixed to the back of your PC case.
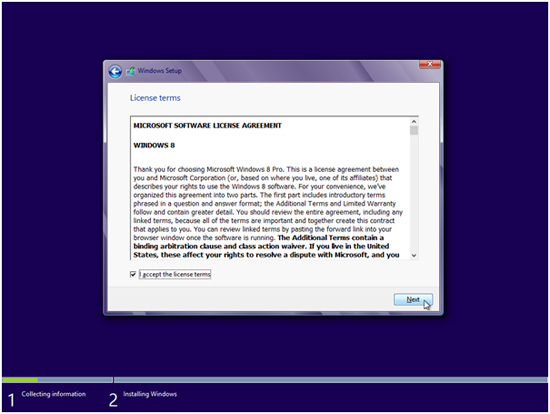
5 – Licence Terms
You will then be displayed the Licence Terms for using Windows 8.1. Please read them and provided you agree click on the box next to the I accept the licence terms, to put a tick in this box and click on Next.
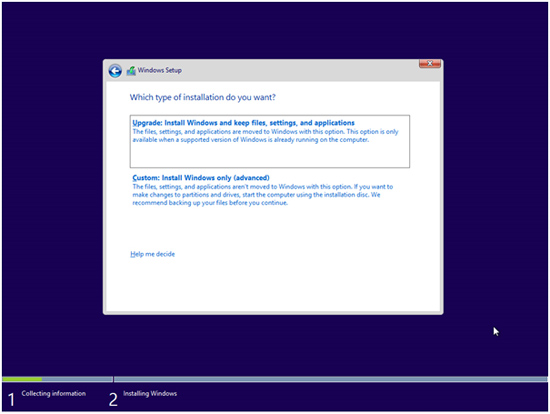
6 – What Type of Installation do you want?
The next screen gives you the option to upgrade your Windows 8.1 installation, for a new installation or re-installation of Windows select the Custom: Install Windows only (advanced) option. Obviously if you are upgrading from an older Windows operating system then you will want to choose the upgrade option for your custom built PC.
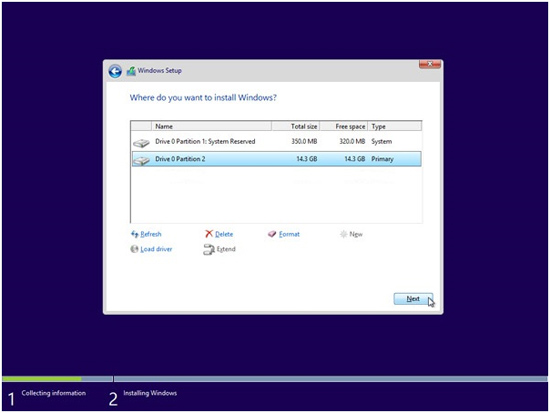
7 – Where to install Windows?
You will then be prompted on what partition you wish to install Windows to. For a new installation there will only be one partition available per disk which should say Disk 0 Unallocated Space, Disk 1 Unallocated Space and so on, select where you want to install your operating system and click next.
If you are reinstalling windows, you will need to delete the original partition on the disk, to do this click on each partition of the disk you want to install Windows to by clicking Drive Options (Advanced)” then Delete and then confirm your actions.
If you have more than one Hard Drive installed, be sure to select the correct drive when doing this process, as this will delete all data on the selected drive.
8 – Off it goes
The installer will then start installing Windows 8.1 to the selected drive, this can take some time depending on the system components so pop the kettle on! If you are installing to a Solid state Hard Drive (SSD) then the installer will be much quicker but there definitely will be time to get a cup of your favourite brew.
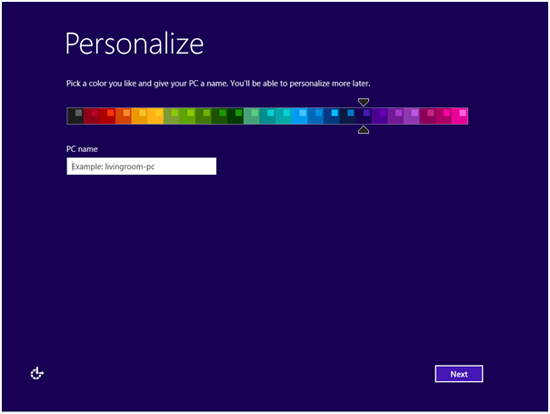
9 – Nearly there
After some time the PC will reboot and continue with the installation. Once it has finished the installation you will be prompted to Personalize the colour scheme of the PC and enter a Computer Name, do this and then click Next
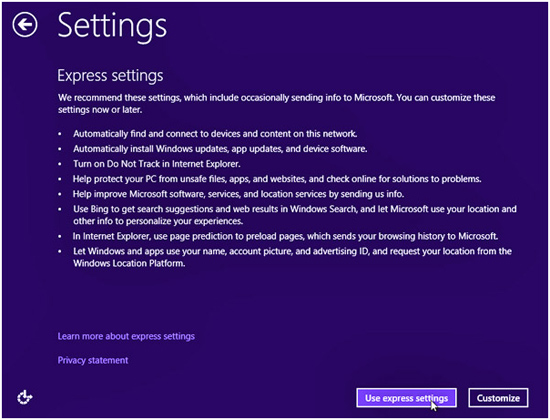
10 – Setup
A settings screen will then be displayed, most users will want to select Use Express Settings though you can select Customize to choose what info you share with Microsoft and other services.
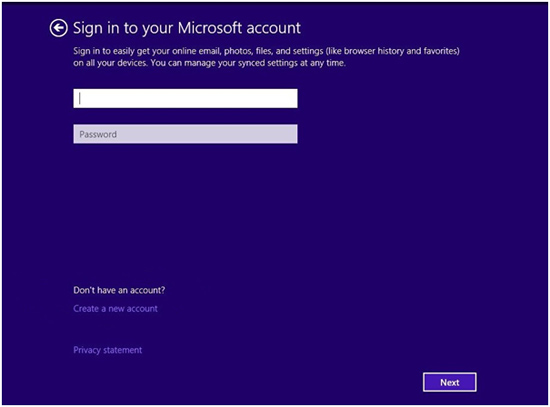
11 – Account
If your computer is connected to a network you will then be prompted to either sign in to your Microsoft account or create a new account. Alternatively if you are not connected to a network, you will then be prompted to provide an account name only, this will create a local account on the PC.
It is not necessary to create a Microsoft Account if you don’t want to and most don't. To get around this, go back to the previous setup screen and disconnect the PC from the network before continuing. You should then be able to proceed by creating a local account.
12 – Don't Forget
You should not be at the stage of Windows 8.1 now being installed. Well done!
Once Windows 8.1 has installed you will need to install the drivers for all the devices in your PC. These drivers will be on disks that are included with the installed components, though as these are usually a little old, we recommend visit the manufacturers websites for each component and download the latest drivers. A Good tip for an easy driver update would be to install the network card or wireless card driver to get the PC connected to an on-line network - once connected switch on Windows updates and set it off downloading and installing. Amongst the updates will be relatively up to date drivers which will be installed automatically. Run Windows update several times to complete all the updates.