

This guide will help you prepare your PC for the upgrade to Windows 11
The rollout of Windows 11 has begun and is being offered as a free optional update to systems currently running Windows 10. Not all systems will be automatically eligible for this update due to the new Windows 11 system requirements.
Windows 11 requires that the Trusted Platform Module (TPM 2.0) and Secure Boot are enabled on your computer. The majority of our systems will have these options available but won't necessarily be enabled by default. There are various ways to check if these options are enabled for you and if you meet the Windows 11 system requirements.
Checking System Compatibility
Although Windows 11 is a free feature update to Windows 10, you may have already noticed Windows marking your system as not meeting the minimum system requirements for the upgrade. This doesn't always mean your hardware can't support the new operating system, just that some settings need turning on or adjusting.
Windows 11 System Requirements
Below are the system requirements for running Windows 11. The power of your hardware is likely always going to hit these targets but some requirements (TPM 2.0, UEFI BIOS) will depend on the age of your system. All of the current systems we sell will meet this requirement.
- CPU: 1GHz or faster or System on a Chip (SoC) with two cores minimum.
- RAM: 4GB.
- Storage: 64GB or larger.
- Firmware: UEFI with Secure Boot.
- TPM: Trusted Platform Module (TPM 2.0).
- Graphics: Compatible with DirectX 12 or later.
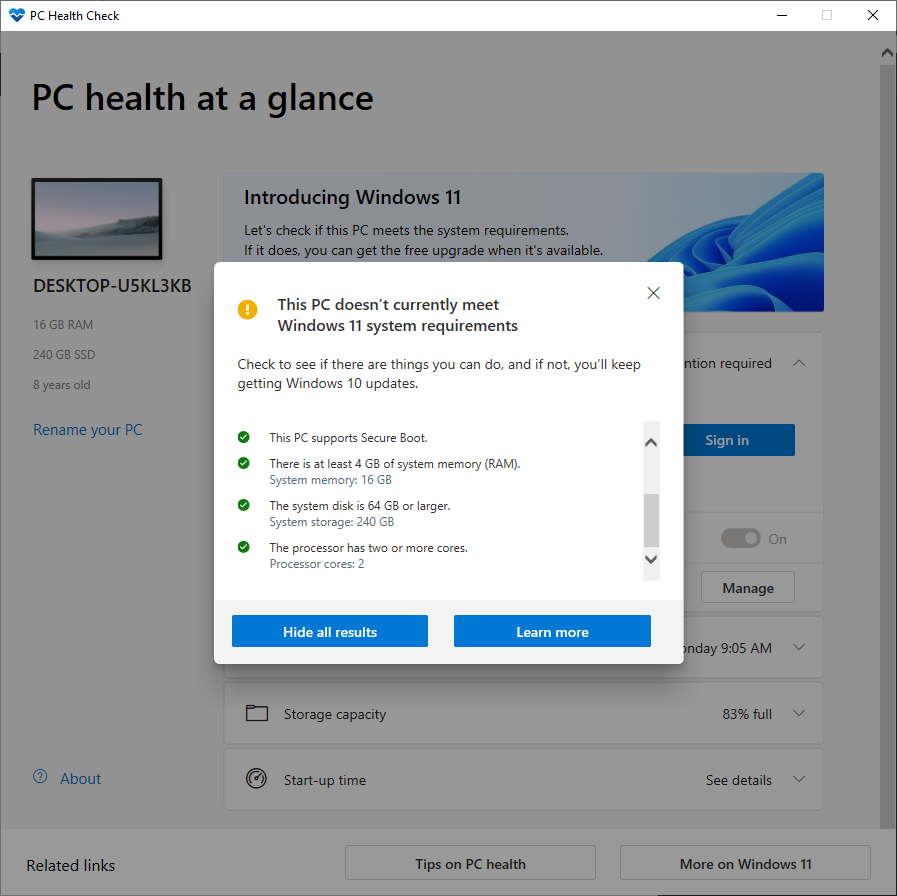
The fastest and easiest way to check the current status of your system against these requirements is using the Windows PC Health Check App. This application was provided by Microsoft to check if your PC can run Windows 11 and give you a rundown of what needs addressing in order to install Windows 11.
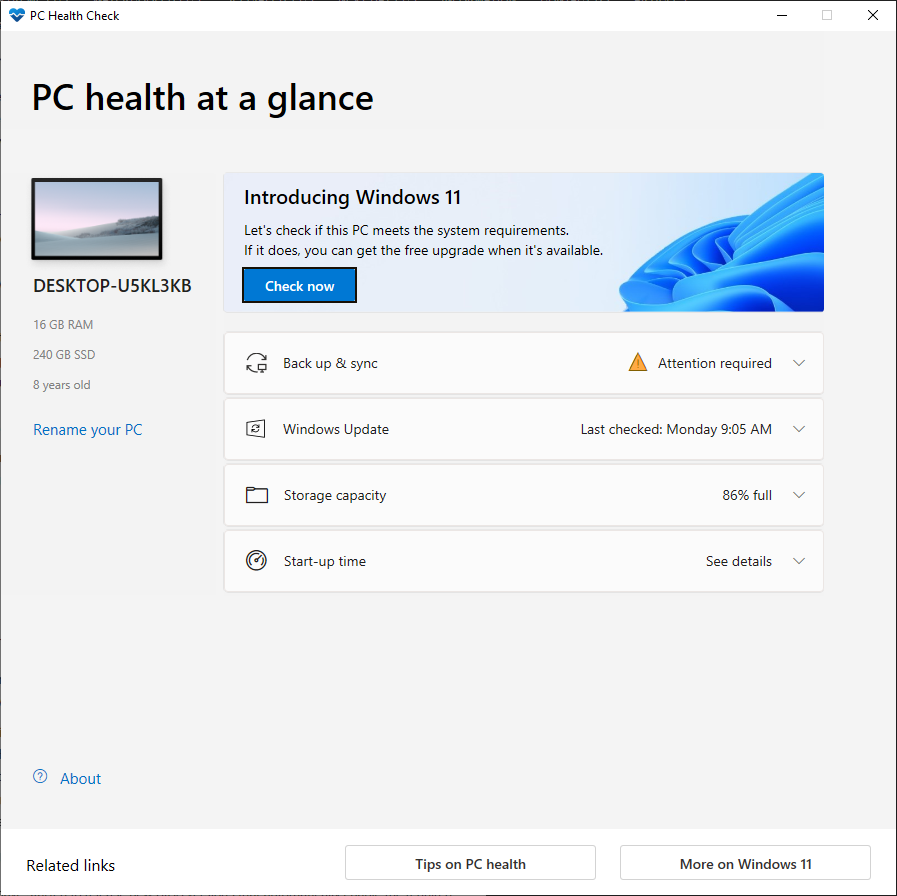
Once the PC Health app is ran, you'll either get the all clear for compatibility or an itemized list of what needs resolving before you can upgrade to Windows 11.
Enabling required features for Windows 11
If the PC Health app flags certain settings that need changing, we'll need to enter the UEFI BIOS to turn them on. In this section we'll detail how to enable these settings individually.
You might find the actual limitation is the age of your hardware. The required features for Windows 11 only became standard on somewhat recent hardware configurations, primarily CPUs. On top of this Microsoft has set some limitations on what CPUs and more will support Windows 11 upgrades. You can find a list of compatible hardware here for Intel and here for AMD. If you find your CPU is not listed its possible the settings detailed below will not be available to you.
Method 1 - Updating your UEFI BIOS
Motherboard manufactures have started to release new BIOS versions that automatically enable the required settings for Windows 11 by default. This can be an easier way to make sure everything is setup as it should be. You can check out how to update your BIOS via this link.
Method 2 - Changing settings manually
Alternatively we can enable these settings manually. The 2 settings that need to be enabled are a the Trusted Platform Module (TPM 2.0) and Windows Secure Boot.
Step 1
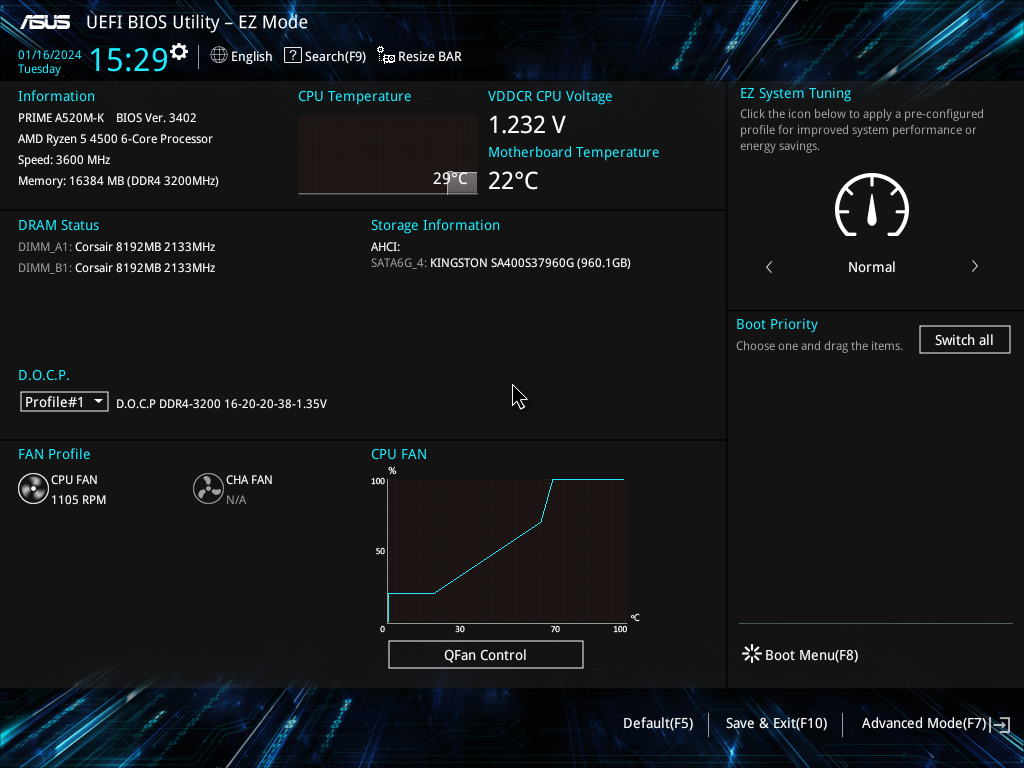
From an off state, turn your PC on and whilst it is booting, continuously hit the "Delete" key or the "F2" key to enter the UEFI BIOS.
Step 2
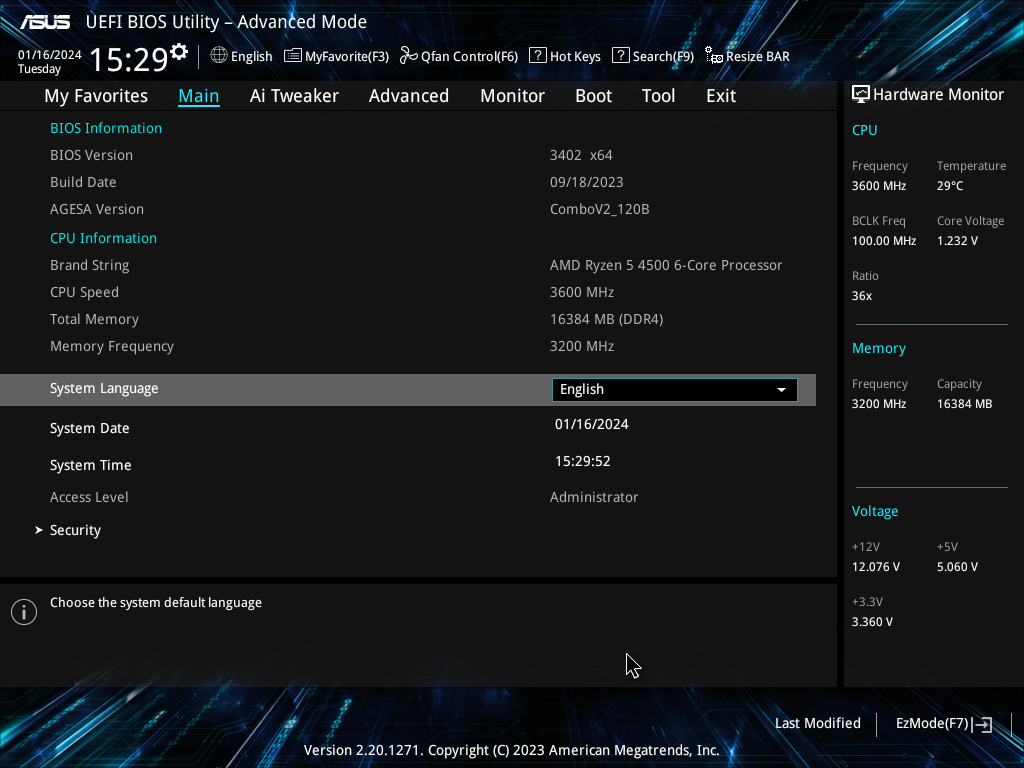
Switch over to the advanced settings menu by hitting the "F7" key on your keyboard. You can see which menu you are currently in from the top left of the screen.
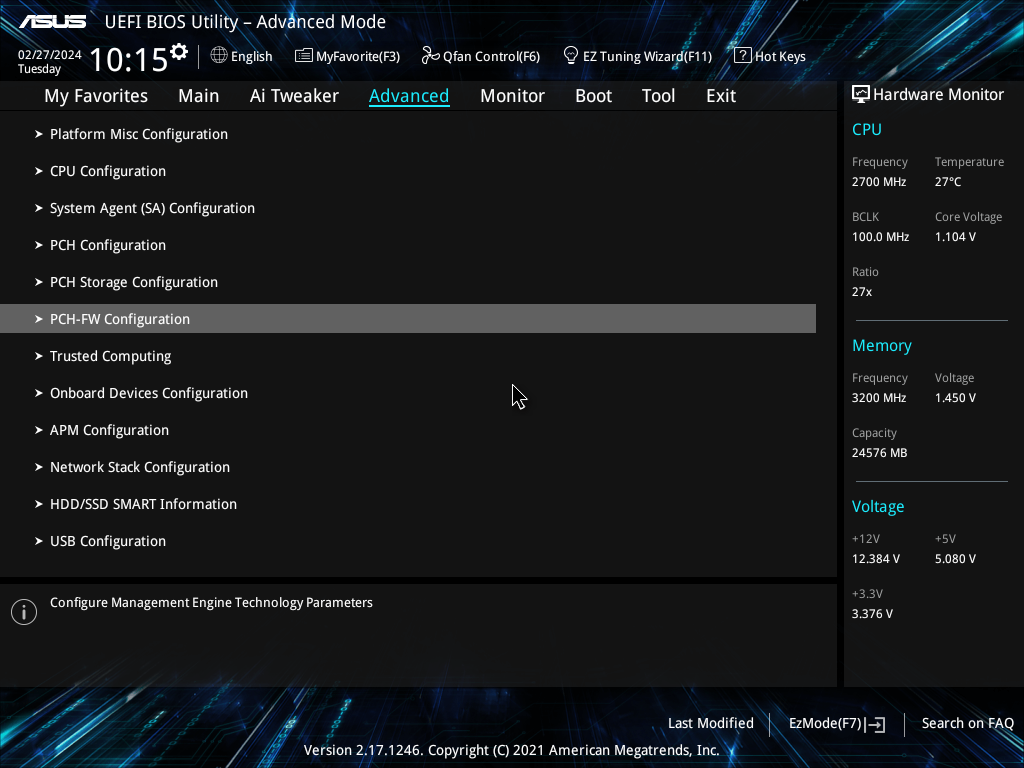
Step 3
Navigate to the "Advanced" tab using the arrow keys or your mouse and locate the "PCH-FW Configuration" menu. If you are using an AMD based system this menu may be called "Trusted Computing" but it will still be in this Advanced menu section.
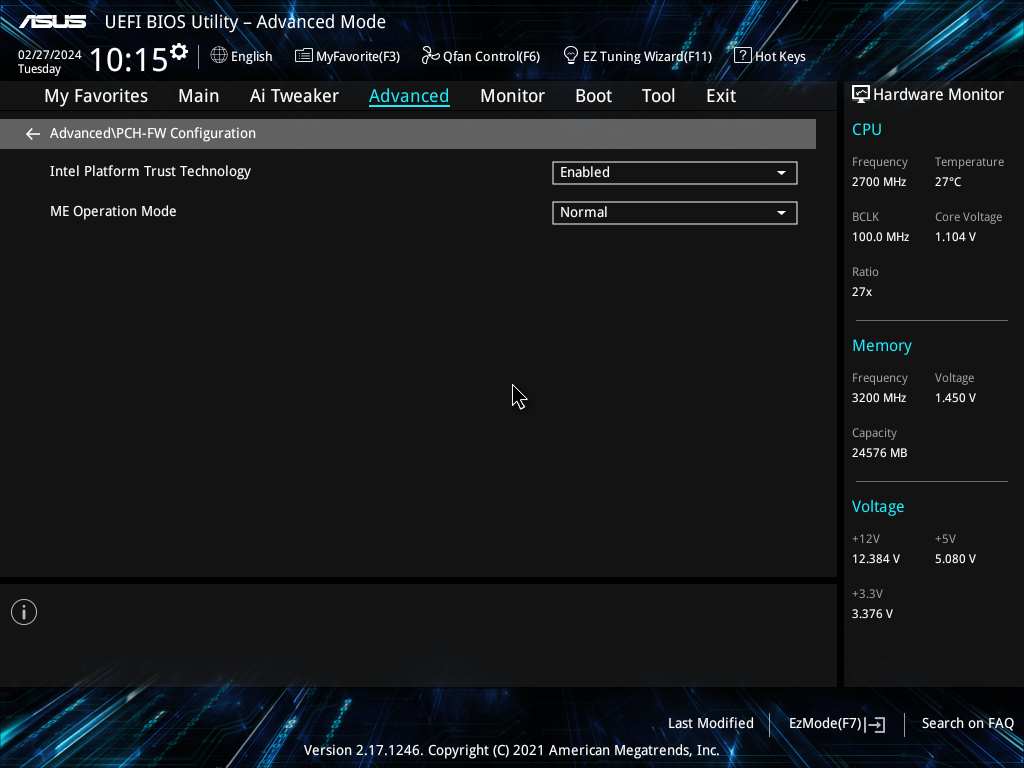
Step 4
Enter the above menu and enable the "PTT" setting. This is a form of TPM 2.0 on Intel. For AMD based users this option is more clearly labelled as "TPM Module" or "TPM 2.0".
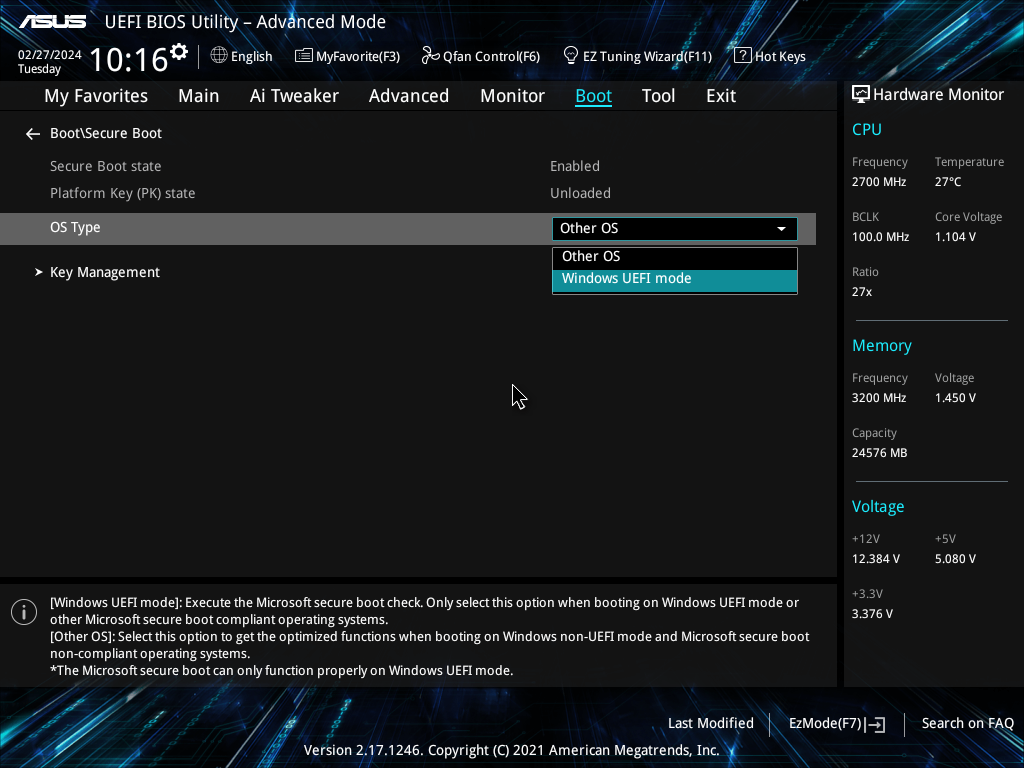
Step 5
Navigate to the Boot tab in Advanced mode and then locate the "Secure Boot" menu. Set the "OS Type" to "Windows UEFI Mode". If your Windows installation partition is configured as a Master Boot Record (MBR) instead of a Genuine Partition Table (GPT) you may need to convert it before changing this option. All recent UK Gaming Computers Windows installations are configured to GPT however we'll have a guide on converting this soon.
Step 6
We can now save and exit the UEFI BIOS by pressing the "F10" key on your keyboard. Your system will now restart and boot back into Windows. If your system now fails to boot into Windows it is likely your Windows installation is installed using legacy methods (MBR) and will need changing. If this is the case. Simply revert these settings, you can follow our guide on converting your Windows partition coming soon.
Further Information
With these settings changed, if your hardware configuration meets the Windows 11 system requirements you should now be able to upgrade when Windows 11 becomes available to you. If you'd like to find out how to install Windows 11 from a clean slate you can do so by following this guide. You can also check out Microsoft's upgrade information here.