Here at UK Gaming Computers, we get a lot of interest in the venturing to the world of water cooling, but we often get asked, “What is the difference between a closed and an open loop”. We’ve taken the time to come up with this article that will hopefully make everything transparent.
1 – Introduction – What is an open loop? What is a closed loop?
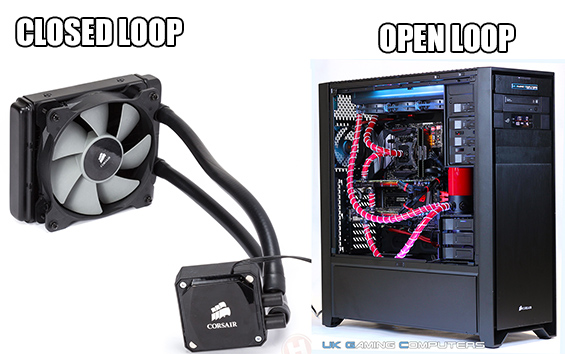
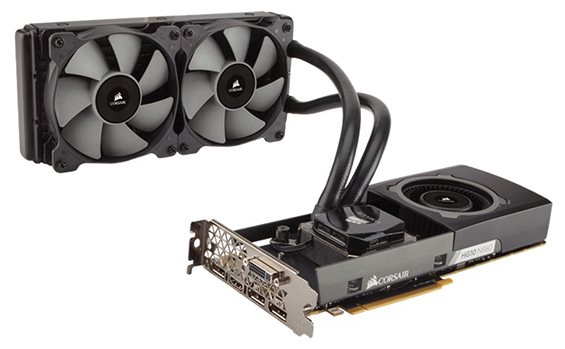
We’ll start with a closed loop. Essentially, a closed loop is a pre built water cooling loop that you don’t have to put together yourself, it comes pre made out of the box and is installed to a system by simply attaching the radiator/fans to the case and a CPU block usually via a specific bracket. These are sometimes known as an “all in one water cooler”. Here at UK Gaming Computers, we currently offer closed loop options in the form of the Corsair Hydro (non X) series and Cooler Master Masterliquid series however there are many other brands out there. There are three main parts to these coolers, the radiator, the low evaporation tubing and the copper cold plated pump. With these coolers, there isn’t anything you need to do yourself apart from installing them to your system; this does make them very un-modular, however it is an easy option for water cooling.
So, if that’s a closed loop, what is an open loop? An open loop is something you have to create yourself from scratch. Out of the box comes a separate radiator, pump, waterblock(s), reservoir, fittings, tubing and coolant which you have to custom assemble after you have decided on what you want. They are also known as a “custom water cooling loop”.
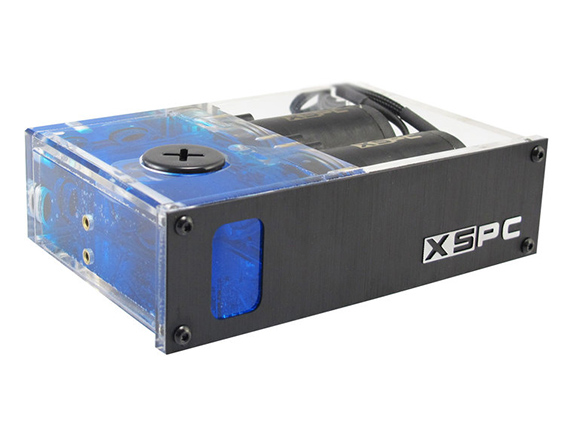
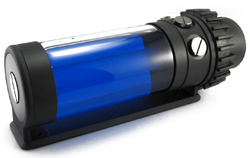
Unlike the closed loop option there are considerably more options to choose from. For example radiators comes in many more sizes - 120mm, 240mm , 360mm and 480mm along with varying thickness’s, fin densities and port layouts. The pump/reservoir is also something that varies considerably. You can have your pump/reservoir either in the front of your PC which takes a front bay or you can go for a Tube Cylinder pump/reservoir, which is much larger than its front bay counterpart but it actually sits more inside the system than the front bay pump/reservoir.
In this article, we are going to compare the two, giving you an in depth analysis into water cooling, offering pros and cons in a round by round points system for both sides leaving us with a conclusion of what will be best for yourself.
Case Choice
Our first stop, your choice of case. Not everyone may see this as something that is important, but if you have a case that isn’t up to the job of housing a water cooling set up, closed or open, then unfortunately you will have to change the case or extensively modify it. Not every case has the room for water cooling and the bigger and fancier set up you get, the lesser options you have for a case. If your chosen case happens to be something like a Corsair 1000D, you aren’t going to have much of a problem; you can probably get yourself inside that case! If you look at a smaller case like a Cooler Master MasterBox Lite 5 , you can only fit a slim 240mm radiator in and probably have little to no room for anything else which is no good for open loops.
If you are more inclined towards an open loop, you have more factors to think about. Firstly, the radiator, can your case hold a 360mm or 480mm radiator? Or are you limited to 240mm? A good example of this, the Coolermaster Cosmos SE case, a fairly sizeable case but isn’t compatible with a 360mm radiator, for a 360mm radiator, you have to look even bigger, you can go for the SE’s big brother, the Cosmos 2/C700P. You also have to think about your reservoir, while pretty much any full height case will be compatible with a front bay reservoir, you are going to be hard pushed to find one compatible with a tube reservoir such as an XSPC Photon. For a case to be compatible with a large tube reservoir more room is a must as too is a suitable mounting point which will often have to be custom made.
Your choice of case is important when it comes to water cooling. More cases offer compatibility with closed loops rather than open loops, so, for this, we’re going to award the point in this round to the closed loop, simply because closed loops are accepting of smaller cases, open loops aren’t so forgiving.
Closed loops 1 – Open loops – 0
Cost
Closed loop systems are cheaper, period. Take a Corsair H100i PRO RGB for example – A closed loop system consisting of a 240mm Radiator which retails around £110.00. A similar 240mm Custom loop without cutting corners starts at £150.00 and can easily move north of £1000 for complex loop.
Closed loops 2 – Open loops – 0
Tools Required
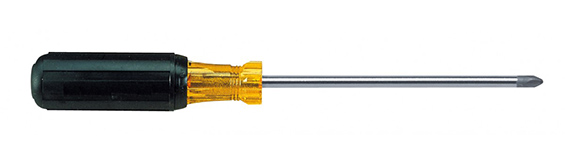
This is where, for the home user trying to install their own set up, things can start to get complicated. If you don’t have the correct tools, you’re stuck before you’ve even began. For a closed loop it isn’t a problem. All the screws you need come with the kit that you’d buy, all you need is a standard Phillips cross head screwdriver. If you’re all about cable management, you may want to invest in some cable ties and mini wire cutters if you don’t have any at hand but they’re not essentials.
Open loops require quite a few more tools. As with the closed loops, you’ll need a standard Phillips Cross head screwdriver, and, again, if you’re all about good cable management, you’ll want to invest in some cable ties and mini wire cutters. Most the screws you need will come with the components you purchase but you’ll need to get your hand on some tube cutters, flat head screw drivers, potentially a drill to make the reservoir/pump mounts, fluid to flush the loop, tape measure and a 24pin jumper if you plan on leak testing. If you are doing the loop with hard tubing then in addition you will need a heat gun, chamfer tool, silicon inserts and a bending tool/angles.
With open loops, you have to be careful that the tubing you cut is fairly accurate. Once cut, it either has to be used, cut to size or written off. The tubing you get with an open water cooling kit isn’t unlimited; you do have to be careful. A rule that we tend to go by here when creating a loop, is to slightly overcut the tubing then cut it down to size, the amount of tubing you get will allow that. That isn’t quite where an open loop ends however, whether you get a photon cylinder reservoir, or a front bay reservoir, you’ll need a large Phillips flathead screwdriver to open to lid for when you fill the system and to seal it back up. Its very important to make sure you’re careful when doing this, burring the thread on this could write the reservoir off!
If you’re planning on putting your GPU underwater, you’ll also need to get your hands on a GPU water block that’s compatible with your GPU, extra fittings and tubing. For the fittings, you’ll also need a pair of large combination pliers, to help tighten them up. We also recommend flushing any copper based component with acid and distilled water, if you don't then your fluid will be a different colour after just a few days of operation.
Going on this information, open loops can be a bit of a headache, it all has to be 100%, if you go wrong, you can find yourself re-buying parts or worse, if it leaks where its not all fitted correct, liquid can get everywhere and you don’t need me to tell you, liquid and computer components tend not to go well together. Luckily, most fluids out there are non-corrosive so it SHOULDN’T affect your parts if this happens, but funnily enough, we don’t want to test that, nor do we recommend it. Because it’s a heck of a lot easier and a lot less risk involved, we’re awarding the point this round to closed loops.
Closed loops 3 – Open loops – 0
Customization
The ability to customize a custom built PC has been a right since day one. It’s a popular option and when it comes to water cooling your PC this area is not exempt.
Let’s start with closed loops. The long and short of it, is they’re not very customizable. They are, in the sense that you can customize your system by installing one to your CPU, but it terms of what you can physically do to the component, you’re very limited. You can change the fans for higher or lower flow fans, RGB fans or add a better thermal paste, but that’s pretty much it, it will install the same way and there isn’t anything else you can add on or take off that helps improve its performance.
As the same suggests, Custom built loops offer more, a lot more! We’ve touched on it already but almost every component in the loop is changeable and upgradable.
Reservoirs, you have the choice of a front bay reservoir, or a cylinder tube in numerous shapes and sizes. Same applies to radiators as we briefly touched on, there is probably around 40 different sizes you can choose from, with a closed loop you get the one size you are given which are always considerably smaller than any open loop option.
A CPU or GPU waterblock will present you with probably 30 or 40 choices with a closed loop system you don’t get a choice of CPU waterblock – you get what you are given and don’t even have the option for choosing a GPU waterblock with an all in one solution.
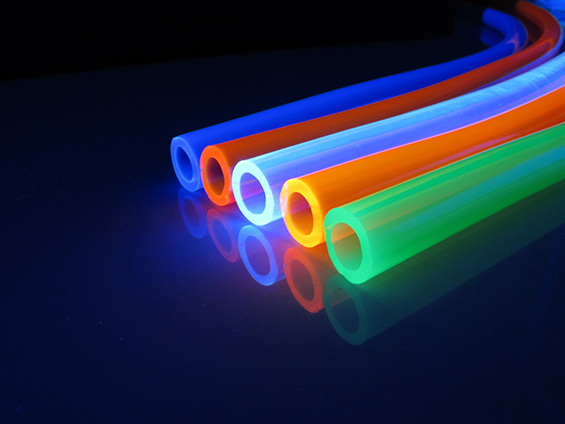
Tubing options vary massively and is a hugely popular varied choice when it comes to deciding on a systems colour scheme. You get what you are given with a closed loop system which is usually a fixed 12mm black rubber like tube as where with an open loop you have a pool of probably 50 choices. From simple clear tubing to UV colours, solid colours, different sizes or even hard acrylic/PETG tubing the list is almost endless.
Pumps are another area where a custom loop considerably excels over a closed loop. With a closed loop the “get what you are given” applies as where an open loop will present you with dozens of choices that all vary in flow rate, pressure, size & shape and mounting options.
Finally radiators massively differ between the two solutions – in general a closed loop will popularly come in 3 sizes – Single depth 120mm, dual depth 120mm and single depth 240mm depending on the all in one solution chosen. Open loops again present a few dozen options – 120mm, 240mm, 360mm & 480mm all in single, double, triple and even quadruple depth flavours along with other varying options like fin densities and relocate-able ports.
There is only one clear winner here and it goes to the custom open loop water cooling solution for its first point.
Closed loops 3 – Open loops 1
Ease of fitting
How easy are either of these set ups to fit? They both have their ups and downs but here in this section, we’re going to look at what installation is like, offering our own thoughts.
For closed loops, there are two parts that you need to connect up, the CPU block which acts as the pump and the radiator. The tubing comes connected and goes between the two. The CPU block is held in place by a back plate and thumbscrew mount (Intel) or if you’re going AMD, you use the back plate that you’d use for a standard cooler and you will have clips that hold themselves onto the hook of the AMD back plate and held in place by a thumbscrew each. That’s the same for nearly every closed loop solution such as anything from Corsair or CoolerMaster.
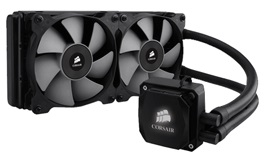
Take the popular Corsair Hydro H45, H80i and H100i. The difference between the 3 comes when fitting the radiator. The H45 and H80i have single radiators, the H45 holding one fan, the H80i holding two (one either side), the H100i has a dual radiator holding two fans that both go on the same side. Generally the H45 and H80i radiators will go on the rear of the case and act as an exhaust, the H100i radiator will generally go on the roof of the case and can act as either an intake or an exhaust (we lean towards the exhaust setup). The Hydro coolers are quite nice and easy to set up, the radiators can sometimes be a bit tight to get in depending on your case but that’s not too much of a problem, ideally, you’d only need to take it off when upgrading and taking it off isn’t as fiddly as putting it on. If you can install a CPU air cooler and fans to a case then you will be able to install a closed loop cooler with relative ease.
Now for Open loops, they are considerably harder to install but this is where the fun begins. Before installing any part, you’ll want to install the fittings to each loop component before you install it to the case, take it from my experience, it’s a heck of a lot easier this way round. Your front bay sits in as any other front bay part would. If you’re using a tube reservoir, providing it’s compatible, you can use the provided screw mounts, just make sure that the pump is tightened to the reservoir (if there is one), don’t trust that it’ll come out the box like it!
For the radiator, the fitting is similar to a closed loop solution. The CPU block also fits very similarly to a Hydro series cooler, back plate creates the thread for the screw fittings to hold the block in place. The screws do have springs and washers that are also required to go in place. Once its all in, the last bit to do is tube it up! As previously mentioned, tubing is a bit of a dark art to get right, we recommend over cutting slightly then cutting down to size, it’s a heck of a lot easier than trying to jam a roll of tube in the system just to get 10 inches of tubing cut. You have to ensure that the ends of the tubes are flush and when installing them and they are pushed right to the end of each fitting, only then is the loop ready to be filled!
There’s a lot more to installing an open loop than a closed loop, bearing in mind these are very brief overviews of the installation process, we’re going to go on the record and say we don’t recommend attempting the open loop at home as it can be stressful and a lot of work if it goes wrong! For this, we’re going to give the point in this section to closed loops, it’s a lot easier to install, while it doesn’t have the customization of an open loop, having everything pre assembled is too much of an inconvenience to overlook in this section.
Closed loops 4 – Open loops 1
Performance
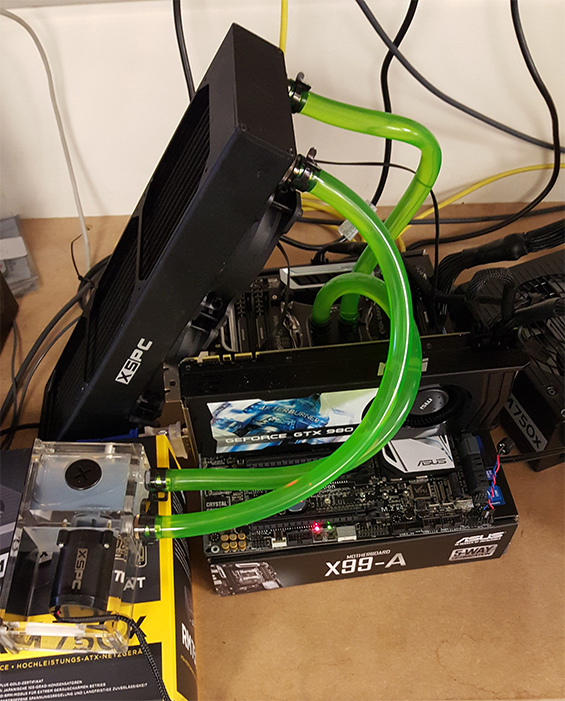
Alright, let’s put the chit chat to the side and get down to business. How well do these coolers all perform against each other. We’ve set up a testing rig for this article, we’ve put together a pretty spicy system, an X99 set up, we have the I7 5820K, sitting in the Asus X99-A, married with a whopping 32GB of Corsair DDR4 Quad channel 2400MHz RAM, Powered by a Corsair RM750x, a Corsair 250GB SSD for that speedy performance, topped off nicely with an Nvidia GeForce GTX 980 4GB running in a Windows 10 environment. To make these tests fair, we have tested each cooling solution on the same set up, in the same location, on the same day, keeping the same room temperature with our swish climate control and using the same thermal paste so everything is given a fair, level playing field.
We created 5 setups, each with the same spec as listed above but using 5 different cooling solutions to test CPU temperatures.
H60 – A Retail Corsair Hydro H60 with 1 x Corsair 31-000403 Fan
H80I – A Retail Corsair Hydro H80I with 2 x Corsair 31-000403 Fans
H100I – A Retail Corsair Hydro H100I with 2 x Corsair 31-000403 Fans
240mm Radiator - A Custom loop consisting of an XSPC EX240 Radiator, XSPC Raza CPU Waterblock, XSPC X20 420 Radiator/Pump combo and 90cm of XSPC 12/16mm Green UV Tubing along with simple distilled water and 2 x Corsair 31-000403 Fans
360mm Radiator – A Custom loop consisting of an XSPC AX360 Radiator, XSPC Raza CPU Waterblock, XSPC X20 420 Radiator/Pump combo and 90cm of XSPC 12/16mm Green UV Tubing along with simple distilled water and 3 x Corsair 31-000403 Fans
For each setup we booted into Windows and after 15 minutes recorded the CPU idle temperature using HW Monitor. Each setup then had the CPU loaded with a workload using Aida 64, after 15 minutes the highest recorded temperature was recorded. We also used CPU-Z to keep an eye on voltages and frequencies, whilst it was not really necessary when testing the CPU at stock performance it was handy to check our overclock tests and generally keep an eye on what the CPU was up to.
Here is what we found;
Cooler
Idle temps
Load temps
3DMark
3DMark Fire Strike
H60
32°c
51°c
15742
11850
H80I
29°c
46°c
15830
11819
H100I
27°c
43°c
15823
11823
240mm Radiator
27°c
42°c
15702
11819
360mm Radiator
25°c
37°c
15665
11792
We also benchmarked each system using 3D Mark11 and 3D Mark Firestrike to give a bench mark score, however this will give a benchmark score for the system as a whole as opposed to just the CPU. From what we get here, the choice in cooler isn’t going to affect your systems physical performance, bench scores won’t come out as the same number every single time so changes of a few hundred isn’t a problem, changes of a few thousand is when it starts to become noticeable. In terms of in game performance, if you are on stock settings, don’t expect to have a game run faster simply because you have a H100I compared to someone who has a H60, it doesn’t quite work like that.
The temperatures improved with a better cooler, even just on idle, while at this point, there isn’t much to choose, the system as a whole will run cooler on a 240mm radiator open loop set up compared to that of a Corsair H80I. The idle temps are improved but not overwhelmingly different unless you compare the Corsair H60 to a 360mm radiator open loop set up but then you really are looking at two different ends of the spectrum. 51°C was the highest load temperature out of all the setups and in the real world, this is well within threshold so in this kind of setup there is little to be gained by having a big custom loop but there is a clear correlation between better cooling setups and lower temperatures.
Something we did notice which fascinated us, was the relation between the Corsair H100I and a 240mm radiator open loop, going on just these results, there barely was anything to pick between them, but then in all honesty, we haven’t asked the CPU to do too much work in the grand scheme of things.
Overclocking
From this, we have decided to add an overclock to the CPU and compare the performances again, we’ve clocked the CPU to 4.4GHz and put 1.26 voltage through the system. Its not a jaw dropping, bums off seats overclock, but it is still a healthy and very respectable 33.3% CPU performance bump.
Cooler
Idle temps
Load temps
3DMark
3DMark Fire Strike
H60
33°c
74°c
16745
12208
H80I
30°c
66°c
16685
12193
H100I
28°c
63°c
16575
12202
240mm Radiator
28°c
59°c
16722
12148
360mm Radiator
25°c
55°c
16747
12211
Okay, so we’ve put each cooler through its paces and these are the results we’ve come out with; as we expected, all 5 coolers made it through the test. The H60 has started to show its limitations, while it came through the test, 74°c is a bit toasty, its workable, but its something you’ll want to keep an eye on, if your system becomes clogged with dust and the overall temps increase, you may find your system shutting down on you! Every other cooler was pretty comfortable to be fair, if we’re honest, we probably didn’t expect the Corsair H80I to keep up but it’s proved us wrong here, its on the verge of warranting an eye being kept on it but at 66°c, as long as the system is well maintained, the cooler will be fine.
The gap between the Corsair H100I and the 240 Radiator is still pretty close although the gap has increased ever so slightly. Baring in mind, this is an overclock that is made in mind with keeping the Corsair H60 alive, we’d expect the H100I to still, comfortably deal with this, but with both being under 60°c, the 240 and 360 radiator set ups are starting to give themselves plenty of breathing space.
Because of this, we want to put the coolers through an extreme clock, we’re losing sympathy for the lesser models, this clock is going to be made just to simply test the limits of the 5 coolers, if we’re being honest, its mainly just to test the Corsair H100I up against the 240 and 360 Radiators, we’ll still run the Corsair H60 and H80I because you never know they may surprise us but we’re not holding hope. We’ve bumped the CPU up to 4.7GHz and have now put 1.35 voltage through the CPU.
Cooler
Idle temp
Load temp
3DMark
3DMark Fire Strike
H60
45°c
Fail - Overheats
16905
12260
H80I
38°c
Fail - Overheats
16868
12306
H100I
34°c
86°c
16924
12263
240 Radiator
33°c
73°c
16898
12225
360 Radiator
26°c
68°c
16802
12188
Now we really have separated the men from the boys, this clock has really put daylight between coolers that were once pretty close. The Corsair H60 and H80I simply haven’t been able to keep up, we did say that it wasn’t really a clock designed with them in mind and unfortunately they’ve tumbled over. The Corsair H100I has survived, just, and when we say just, its on the edge. If you see yourself as a bit of an Evel Knievel, you’ll probably be pretty happy with a clock at those temps, if we’re completely honest, you can get away with it, not that we’d recommend it , but what is interesting is the temps from the H100I when compared to the 240 and 360 Radiator, 3 coolers which, at the start of the tests, were pretty close, the H100I and 240 Radiator especially. But now, they’re a world apart. The 2 open loop set ups undoubtedly trounce the closed loops here, the 240 loop runs 13°c cooler giving it plenty of room to play with and the 360, the 360 radiator has nearly 20°c to play with! It’s impressive, considering it isn’t a light clock we’ve put it through, that’s a pretty beefy clock considering it’s a 6 core processor that’s churning out those numbers.
In terms of Performance, it’s a no brainer here, the closed loop H100I set up kept up for a while but ended up falling to the open loops when really put to the test, the H80I and H60 never really cut the grade when put next to them. We’re going to award the point of this round to open loops.
Closed loop 4 – Open loop 2
Pumps - Flow Rates
Now, let’s get a little more technical and slightly off track, let’s look at different set ups’ flow rates and how they actually affect your water cooling.
Cooler/pump
Flow Rate
Corsair H60 Retail
2 Litres per minute
Corsair H80I Retail
2 Litres per minute
Corsair H100I Retail
2 Litres per minute
XSPC Single 420 Bayres
7 Litres per minute
XSPC Lang D5 Pump
20 Litres per minute
Now, I can hear you saying, “Well that’s all good, but what does it mean?” The long and short of it, a higher flow rate will give you lower temperatures, providing that no key variable has changed (extra fans, different ambient temps, different length tubing etc). Having said that, a bigger pump will generate more heat, this heat has to go somewhere, it is transferred to the coolant inside the loop, but because of the bigger pump, the coolant can flow much faster, meaning there is less turbulent flow when the fluid is in a vessel (CPU block, pump, and radiator) which is a good thing, fluid gets from A to B to C and back to A much faster, meaning that the fluid is spending less time heating up, keeping the overall temps of the system down. This is something we want to put to the test.
We’re going to compare 2 bits of data we collected earlier, the H100I and the 240mm radiator setup with the front bayres scores on an overclock of 4.7GHz with 1.35 voltage, and see what happens when we swap the front bayres on the 240 for a Lang D5 pump which as a massive 10 times the flow rate of a closed loop solution. To make this fair, again, we have used the exact same set up as we previously used, same components, same thermal paste, same ambient temperature and, for the purpose of the open loop, we’ve used the same tubing in this test. (We’ve had to recreate a loop as our testing rig has been dismantled since so results from earlier tests may vary slightly!)
Cooler
Idle temps
Load temps
H100I
34°c
86°c
Single bayres 240 radiator
33°c
74°c
Lang D5 Photon 240 radiator
28°c
67°c
Now we have our results. We’ve put it on a pretty beefy clock so we can really see how well it performs and we’ve got to say, we’re fairly impressed by the outcome. When you compare the H100I, a very high end closed loop cooler to an open loop set with a 240mm radiator and a Lang D5, under load, there’s nearly 20°c difference! In terms of overclocking, that’s a lot, especially when you consider that the radiator takes up a similar area. When you compare the flow rates, it isn’t surprising that the D5 comes out on top though; it’s moving up to 20 Litres of fluid per minute, that’s a lot of fluid for such a small pump.
There are ways you can help counteract the temps on a ‘lesser cooler’, adding high flow case fans to the case, ensuring the system is kept clean and a high standard of cable management will all help improve the system, whether it gives current air flow a more direct path or adds to the air flow, it will all help drop the temps a bit, but don’t kid yourself into thinking that you can get that H100I to perform to the levels of the Lang D5 and custom 240 Radiator setup, you can help close the gap a bit, but they won’t become equals.
This section’s a complete no brainer, custom open loops run away with it here, when your CPU is put to the sword, the temps are kept a lot lower.
Closed loops 4 – Open loops – 3
GPU cooling
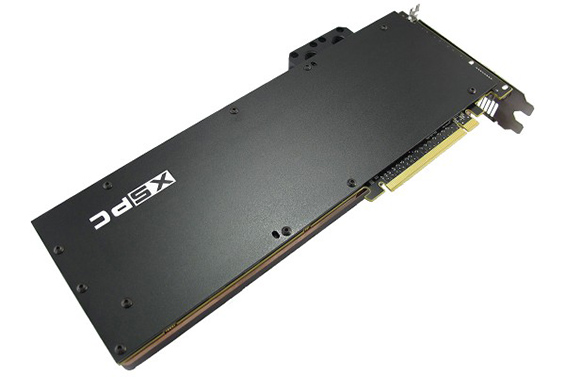
While we’ve only really touched on the CPU performance/temperatures thus far but you can water cool your graphics card as well! You have to be a bit careful here though, certain cards require certain blocks, if your card and your block aren’t compatible, you aren’t going to be cooling much.
You can cool your GPU in the closed or the open loop flavour and, like with most of this article, there are cons and pros to both.
Let’s start with closed loops, rather than being a full on water block it comes in the form of a relatively costly adaptor which allows you to fit the existing CPU block to a GPU. It reaps the benefits of being a closed loop, as its easier to install, that, unfortunately for open loops, is something that closed loops will win at every day of the week. However, if it takes the big benefit of being a closed loop, it must also take its cons. It isn’t customizable. It looks bland, not unlike the CPU closed loops. You can’t make this cooler fit in with the design theme that the rest of your system has, the only real way to make it match is by making the system match the GPU cooler, you can’t do it the other way around, it limits your options.
A big drawback though, if you have two or more graphics cards and want them both closed loop water cooled, you need two separate loops, this can be a real pain. There are cases out there that can be compatible with this, but then, there are a lot that won’t be able to do this. This is also going to add noise to the system, as you’ll need to double your fans and pumps to accommodate for the 2nd radiator.
Now let’s compare this to open loops. I’m not going to lie, they can be a right pig to submerge. The water block for a graphics card isn’t the easiest thing in the world to fit, its something that, like everything with open loops, you have to get 100% correct, if you’re 1% out, its either going to either leak or not sufficiently cool the graphics card resulting in a failed graphics card.
That being said, open loops will go completely the opposite of a closed loop GPU, firstly, it is customizable, if you have dual, tri or quad SLI or Crossfire in your system, you can cool all the cards, you just need a separate block for each. The customization comes into play here, between each card you can decide whether you want to individually tube one card to the next (fiddly but looks better in our opinion) or you can go for a bit of an easier and certainly quicker route, and fit a bridge that connects one card to the next. Customization is a big thing here, if you decide to go for a blue theme in your system, you can use blue fluid which, in some blocks, you can see the fluid as it passes through the GPU or you can use blue tubing between each card to help add to the chosen look.
Provided you manage to get yourself the right block, open loop GPUs look a lot nicer than a closed loop solution/bracket. It looks like it’s meant to fit as opposed to the bracket solution and performance wise a proper custom water block runs away with it. We are also wary of fitting the closed loop brackets as things like the VRAM don’t really get properly cooled.
Closed loops 4 – Open loops 4
Conclusion
4-4 – It is a draw but that does not mean your choice does not matter – it is evident each solution has its plus and minus points and your choice should be based on how well suited each solution is for your specific task or goals.
In a nut shell, if you’re looking for the best performance which most enthusiasts are, we recommend an open loop over a closed loop. There are other factors that say yay or nay either way hence the 4 all draw, but if you're purely looking at performance, we recommend the open loop set up.
We wouldn’t write off closed loops completely, for example the Corsair Hydro H100I certainly gave as good as it got in the early stages of our performance tests, it was keeping up with open loops right up until we increased the overclock to higher levels. If you’re looking to put your CPU under a bit of load, or just want to keep those temps down for peace of mind, we’d say go for a high end closed loop cooler and you won’t be disappointed.
If you’re looking for a solution but have a tighter budget and are not too worried about overclocking then we’d say a lower end closed loop all in one solution will be perfectly fine.
If, however, you’re looking for the crème de la crème, you want that flashy look to your system, want the ability to customize the set up now or in the future, want your CPU to put up with intense workloads or want to water cool your graphics card(s) we’d defiantly recommend an open loop.
When to choose each solution
Closed loop/All in One Coolers
Budget controlled builds
Novice installers/Easy to fit builds
Where a case simply does not allow for a Custom Loop
Lack to tools to build a custom loop
Low CPU Overclocks or standard clock speeds
Open loop/Custom Loops
Highly overclocked CPU builds
Graphics card water cooling
Visually interesting setups
Ability to expand/upgrade the loop
 So, if that’s a closed loop, what is an open loop? An open loop is something you have to create yourself from scratch. Out of the box comes a separate radiator, pump, waterblock(s), reservoir, fittings, tubing and coolant which you have to custom assemble after you have decided on what you want. They are also known as a “custom water cooling loop”.
Unlike the closed loop option there are considerably more options to choose from. For example radiators comes in many more sizes - 120mm, 240mm , 360mm and 480mm along with varying thickness’s, fin densities and port layouts. The pump/reservoir is also something that varies considerably. You can have your pump/reservoir either in the front of your PC which takes a front bay or you can go for a Tube Cylinder pump/reservoir, which is much larger than its front bay counterpart but it actually sits more inside the system than the front bay pump/reservoir.
In this article, we are going to compare the two, giving you an in depth analysis into water cooling, offering pros and cons in a round by round points system for both sides leaving us with a conclusion of what will be best for yourself.
So, if that’s a closed loop, what is an open loop? An open loop is something you have to create yourself from scratch. Out of the box comes a separate radiator, pump, waterblock(s), reservoir, fittings, tubing and coolant which you have to custom assemble after you have decided on what you want. They are also known as a “custom water cooling loop”.
Unlike the closed loop option there are considerably more options to choose from. For example radiators comes in many more sizes - 120mm, 240mm , 360mm and 480mm along with varying thickness’s, fin densities and port layouts. The pump/reservoir is also something that varies considerably. You can have your pump/reservoir either in the front of your PC which takes a front bay or you can go for a Tube Cylinder pump/reservoir, which is much larger than its front bay counterpart but it actually sits more inside the system than the front bay pump/reservoir.
In this article, we are going to compare the two, giving you an in depth analysis into water cooling, offering pros and cons in a round by round points system for both sides leaving us with a conclusion of what will be best for yourself.
 This is where, for the home user trying to install their own set up, things can start to get complicated. If you don’t have the correct tools, you’re stuck before you’ve even began. For a closed loop it isn’t a problem. All the screws you need come with the kit that you’d buy, all you need is a standard Phillips cross head screwdriver. If you’re all about cable management, you may want to invest in some cable ties and mini wire cutters if you don’t have any at hand but they’re not essentials.
Open loops require quite a few more tools. As with the closed loops, you’ll need a standard Phillips Cross head screwdriver, and, again, if you’re all about good cable management, you’ll want to invest in some cable ties and mini wire cutters. Most the screws you need will come with the components you purchase but you’ll need to get your hand on some tube cutters, flat head screw drivers, potentially a drill to make the reservoir/pump mounts, fluid to flush the loop, tape measure and a 24pin jumper if you plan on leak testing. If you are doing the loop with hard tubing then in addition you will need a heat gun, chamfer tool, silicon inserts and a bending tool/angles.
With open loops, you have to be careful that the tubing you cut is fairly accurate. Once cut, it either has to be used, cut to size or written off. The tubing you get with an open water cooling kit isn’t unlimited; you do have to be careful. A rule that we tend to go by here when creating a loop, is to slightly overcut the tubing then cut it down to size, the amount of tubing you get will allow that. That isn’t quite where an open loop ends however, whether you get a photon cylinder reservoir, or a front bay reservoir, you’ll need a large Phillips flathead screwdriver to open to lid for when you fill the system and to seal it back up. Its very important to make sure you’re careful when doing this, burring the thread on this could write the reservoir off!
If you’re planning on putting your GPU underwater, you’ll also need to get your hands on a GPU water block that’s compatible with your GPU, extra fittings and tubing. For the fittings, you’ll also need a pair of large combination pliers, to help tighten them up. We also recommend flushing any copper based component with acid and distilled water, if you don't then your fluid will be a different colour after just a few days of operation.
Going on this information, open loops can be a bit of a headache, it all has to be 100%, if you go wrong, you can find yourself re-buying parts or worse, if it leaks where its not all fitted correct, liquid can get everywhere and you don’t need me to tell you, liquid and computer components tend not to go well together. Luckily, most fluids out there are non-corrosive so it SHOULDN’T affect your parts if this happens, but funnily enough, we don’t want to test that, nor do we recommend it. Because it’s a heck of a lot easier and a lot less risk involved, we’re awarding the point this round to closed loops.
Closed loops 3 – Open loops – 0
This is where, for the home user trying to install their own set up, things can start to get complicated. If you don’t have the correct tools, you’re stuck before you’ve even began. For a closed loop it isn’t a problem. All the screws you need come with the kit that you’d buy, all you need is a standard Phillips cross head screwdriver. If you’re all about cable management, you may want to invest in some cable ties and mini wire cutters if you don’t have any at hand but they’re not essentials.
Open loops require quite a few more tools. As with the closed loops, you’ll need a standard Phillips Cross head screwdriver, and, again, if you’re all about good cable management, you’ll want to invest in some cable ties and mini wire cutters. Most the screws you need will come with the components you purchase but you’ll need to get your hand on some tube cutters, flat head screw drivers, potentially a drill to make the reservoir/pump mounts, fluid to flush the loop, tape measure and a 24pin jumper if you plan on leak testing. If you are doing the loop with hard tubing then in addition you will need a heat gun, chamfer tool, silicon inserts and a bending tool/angles.
With open loops, you have to be careful that the tubing you cut is fairly accurate. Once cut, it either has to be used, cut to size or written off. The tubing you get with an open water cooling kit isn’t unlimited; you do have to be careful. A rule that we tend to go by here when creating a loop, is to slightly overcut the tubing then cut it down to size, the amount of tubing you get will allow that. That isn’t quite where an open loop ends however, whether you get a photon cylinder reservoir, or a front bay reservoir, you’ll need a large Phillips flathead screwdriver to open to lid for when you fill the system and to seal it back up. Its very important to make sure you’re careful when doing this, burring the thread on this could write the reservoir off!
If you’re planning on putting your GPU underwater, you’ll also need to get your hands on a GPU water block that’s compatible with your GPU, extra fittings and tubing. For the fittings, you’ll also need a pair of large combination pliers, to help tighten them up. We also recommend flushing any copper based component with acid and distilled water, if you don't then your fluid will be a different colour after just a few days of operation.
Going on this information, open loops can be a bit of a headache, it all has to be 100%, if you go wrong, you can find yourself re-buying parts or worse, if it leaks where its not all fitted correct, liquid can get everywhere and you don’t need me to tell you, liquid and computer components tend not to go well together. Luckily, most fluids out there are non-corrosive so it SHOULDN’T affect your parts if this happens, but funnily enough, we don’t want to test that, nor do we recommend it. Because it’s a heck of a lot easier and a lot less risk involved, we’re awarding the point this round to closed loops.
Closed loops 3 – Open loops – 0
 The ability to customize a custom built PC has been a right since day one. It’s a popular option and when it comes to water cooling your PC this area is not exempt.
Let’s start with closed loops. The long and short of it, is they’re not very customizable. They are, in the sense that you can customize your system by installing one to your CPU, but it terms of what you can physically do to the component, you’re very limited. You can change the fans for higher or lower flow fans, RGB fans or add a better thermal paste, but that’s pretty much it, it will install the same way and there isn’t anything else you can add on or take off that helps improve its performance.
As the same suggests, Custom built loops offer more, a lot more! We’ve touched on it already but almost every component in the loop is changeable and upgradable.
Reservoirs, you have the choice of a front bay reservoir, or a cylinder tube in numerous shapes and sizes. Same applies to radiators as we briefly touched on, there is probably around 40 different sizes you can choose from, with a closed loop you get the one size you are given which are always considerably smaller than any open loop option.
A CPU or GPU waterblock will present you with probably 30 or 40 choices with a closed loop system you don’t get a choice of CPU waterblock – you get what you are given and don’t even have the option for choosing a GPU waterblock with an all in one solution.
Tubing options vary massively and is a hugely popular varied choice when it comes to deciding on a systems colour scheme. You get what you are given with a closed loop system which is usually a fixed 12mm black rubber like tube as where with an open loop you have a pool of probably 50 choices. From simple clear tubing to UV colours, solid colours, different sizes or even hard acrylic/PETG tubing the list is almost endless.
Pumps are another area where a custom loop considerably excels over a closed loop. With a closed loop the “get what you are given” applies as where an open loop will present you with dozens of choices that all vary in flow rate, pressure, size & shape and mounting options.
Finally radiators massively differ between the two solutions – in general a closed loop will popularly come in 3 sizes – Single depth 120mm, dual depth 120mm and single depth 240mm depending on the all in one solution chosen. Open loops again present a few dozen options – 120mm, 240mm, 360mm & 480mm all in single, double, triple and even quadruple depth flavours along with other varying options like fin densities and relocate-able ports.
There is only one clear winner here and it goes to the custom open loop water cooling solution for its first point.
Closed loops 3 – Open loops 1
The ability to customize a custom built PC has been a right since day one. It’s a popular option and when it comes to water cooling your PC this area is not exempt.
Let’s start with closed loops. The long and short of it, is they’re not very customizable. They are, in the sense that you can customize your system by installing one to your CPU, but it terms of what you can physically do to the component, you’re very limited. You can change the fans for higher or lower flow fans, RGB fans or add a better thermal paste, but that’s pretty much it, it will install the same way and there isn’t anything else you can add on or take off that helps improve its performance.
As the same suggests, Custom built loops offer more, a lot more! We’ve touched on it already but almost every component in the loop is changeable and upgradable.
Reservoirs, you have the choice of a front bay reservoir, or a cylinder tube in numerous shapes and sizes. Same applies to radiators as we briefly touched on, there is probably around 40 different sizes you can choose from, with a closed loop you get the one size you are given which are always considerably smaller than any open loop option.
A CPU or GPU waterblock will present you with probably 30 or 40 choices with a closed loop system you don’t get a choice of CPU waterblock – you get what you are given and don’t even have the option for choosing a GPU waterblock with an all in one solution.
Tubing options vary massively and is a hugely popular varied choice when it comes to deciding on a systems colour scheme. You get what you are given with a closed loop system which is usually a fixed 12mm black rubber like tube as where with an open loop you have a pool of probably 50 choices. From simple clear tubing to UV colours, solid colours, different sizes or even hard acrylic/PETG tubing the list is almost endless.
Pumps are another area where a custom loop considerably excels over a closed loop. With a closed loop the “get what you are given” applies as where an open loop will present you with dozens of choices that all vary in flow rate, pressure, size & shape and mounting options.
Finally radiators massively differ between the two solutions – in general a closed loop will popularly come in 3 sizes – Single depth 120mm, dual depth 120mm and single depth 240mm depending on the all in one solution chosen. Open loops again present a few dozen options – 120mm, 240mm, 360mm & 480mm all in single, double, triple and even quadruple depth flavours along with other varying options like fin densities and relocate-able ports.
There is only one clear winner here and it goes to the custom open loop water cooling solution for its first point.
Closed loops 3 – Open loops 1
 Alright, let’s put the chit chat to the side and get down to business. How well do these coolers all perform against each other. We’ve set up a testing rig for this article, we’ve put together a pretty spicy system, an X99 set up, we have the I7 5820K, sitting in the Asus X99-A, married with a whopping 32GB of Corsair DDR4 Quad channel 2400MHz RAM, Powered by a Corsair RM750x, a Corsair 250GB SSD for that speedy performance, topped off nicely with an Nvidia GeForce GTX 980 4GB running in a Windows 10 environment. To make these tests fair, we have tested each cooling solution on the same set up, in the same location, on the same day, keeping the same room temperature with our swish climate control and using the same thermal paste so everything is given a fair, level playing field.
We created 5 setups, each with the same spec as listed above but using 5 different cooling solutions to test CPU temperatures.
H60 – A Retail Corsair Hydro H60 with 1 x Corsair 31-000403 Fan
H80I – A Retail Corsair Hydro H80I with 2 x Corsair 31-000403 Fans
H100I – A Retail Corsair Hydro H100I with 2 x Corsair 31-000403 Fans
240mm Radiator - A Custom loop consisting of an XSPC EX240 Radiator, XSPC Raza CPU Waterblock, XSPC X20 420 Radiator/Pump combo and 90cm of XSPC 12/16mm Green UV Tubing along with simple distilled water and 2 x Corsair 31-000403 Fans
360mm Radiator – A Custom loop consisting of an XSPC AX360 Radiator, XSPC Raza CPU Waterblock, XSPC X20 420 Radiator/Pump combo and 90cm of XSPC 12/16mm Green UV Tubing along with simple distilled water and 3 x Corsair 31-000403 Fans
For each setup we booted into Windows and after 15 minutes recorded the CPU idle temperature using HW Monitor. Each setup then had the CPU loaded with a workload using Aida 64, after 15 minutes the highest recorded temperature was recorded. We also used CPU-Z to keep an eye on voltages and frequencies, whilst it was not really necessary when testing the CPU at stock performance it was handy to check our overclock tests and generally keep an eye on what the CPU was up to.
Here is what we found;
Alright, let’s put the chit chat to the side and get down to business. How well do these coolers all perform against each other. We’ve set up a testing rig for this article, we’ve put together a pretty spicy system, an X99 set up, we have the I7 5820K, sitting in the Asus X99-A, married with a whopping 32GB of Corsair DDR4 Quad channel 2400MHz RAM, Powered by a Corsair RM750x, a Corsair 250GB SSD for that speedy performance, topped off nicely with an Nvidia GeForce GTX 980 4GB running in a Windows 10 environment. To make these tests fair, we have tested each cooling solution on the same set up, in the same location, on the same day, keeping the same room temperature with our swish climate control and using the same thermal paste so everything is given a fair, level playing field.
We created 5 setups, each with the same spec as listed above but using 5 different cooling solutions to test CPU temperatures.
H60 – A Retail Corsair Hydro H60 with 1 x Corsair 31-000403 Fan
H80I – A Retail Corsair Hydro H80I with 2 x Corsair 31-000403 Fans
H100I – A Retail Corsair Hydro H100I with 2 x Corsair 31-000403 Fans
240mm Radiator - A Custom loop consisting of an XSPC EX240 Radiator, XSPC Raza CPU Waterblock, XSPC X20 420 Radiator/Pump combo and 90cm of XSPC 12/16mm Green UV Tubing along with simple distilled water and 2 x Corsair 31-000403 Fans
360mm Radiator – A Custom loop consisting of an XSPC AX360 Radiator, XSPC Raza CPU Waterblock, XSPC X20 420 Radiator/Pump combo and 90cm of XSPC 12/16mm Green UV Tubing along with simple distilled water and 3 x Corsair 31-000403 Fans
For each setup we booted into Windows and after 15 minutes recorded the CPU idle temperature using HW Monitor. Each setup then had the CPU loaded with a workload using Aida 64, after 15 minutes the highest recorded temperature was recorded. We also used CPU-Z to keep an eye on voltages and frequencies, whilst it was not really necessary when testing the CPU at stock performance it was handy to check our overclock tests and generally keep an eye on what the CPU was up to.
Here is what we found;
 The gap between the Corsair H100I and the 240 Radiator is still pretty close although the gap has increased ever so slightly. Baring in mind, this is an overclock that is made in mind with keeping the Corsair H60 alive, we’d expect the H100I to still, comfortably deal with this, but with both being under 60°c, the 240 and 360 radiator set ups are starting to give themselves plenty of breathing space.
Because of this, we want to put the coolers through an extreme clock, we’re losing sympathy for the lesser models, this clock is going to be made just to simply test the limits of the 5 coolers, if we’re being honest, its mainly just to test the Corsair H100I up against the 240 and 360 Radiators, we’ll still run the Corsair H60 and H80I because you never know they may surprise us but we’re not holding hope. We’ve bumped the CPU up to 4.7GHz and have now put 1.35 voltage through the CPU.
The gap between the Corsair H100I and the 240 Radiator is still pretty close although the gap has increased ever so slightly. Baring in mind, this is an overclock that is made in mind with keeping the Corsair H60 alive, we’d expect the H100I to still, comfortably deal with this, but with both being under 60°c, the 240 and 360 radiator set ups are starting to give themselves plenty of breathing space.
Because of this, we want to put the coolers through an extreme clock, we’re losing sympathy for the lesser models, this clock is going to be made just to simply test the limits of the 5 coolers, if we’re being honest, its mainly just to test the Corsair H100I up against the 240 and 360 Radiators, we’ll still run the Corsair H60 and H80I because you never know they may surprise us but we’re not holding hope. We’ve bumped the CPU up to 4.7GHz and have now put 1.35 voltage through the CPU.
 Now we really have separated the men from the boys, this clock has really put daylight between coolers that were once pretty close. The Corsair H60 and H80I simply haven’t been able to keep up, we did say that it wasn’t really a clock designed with them in mind and unfortunately they’ve tumbled over. The Corsair H100I has survived, just, and when we say just, its on the edge. If you see yourself as a bit of an Evel Knievel, you’ll probably be pretty happy with a clock at those temps, if we’re completely honest, you can get away with it, not that we’d recommend it , but what is interesting is the temps from the H100I when compared to the 240 and 360 Radiator, 3 coolers which, at the start of the tests, were pretty close, the H100I and 240 Radiator especially. But now, they’re a world apart. The 2 open loop set ups undoubtedly trounce the closed loops here, the 240 loop runs 13°c cooler giving it plenty of room to play with and the 360, the 360 radiator has nearly 20°c to play with! It’s impressive, considering it isn’t a light clock we’ve put it through, that’s a pretty beefy clock considering it’s a 6 core processor that’s churning out those numbers.
In terms of Performance, it’s a no brainer here, the closed loop H100I set up kept up for a while but ended up falling to the open loops when really put to the test, the H80I and H60 never really cut the grade when put next to them. We’re going to award the point of this round to open loops.
Closed loop 4 – Open loop 2
Now we really have separated the men from the boys, this clock has really put daylight between coolers that were once pretty close. The Corsair H60 and H80I simply haven’t been able to keep up, we did say that it wasn’t really a clock designed with them in mind and unfortunately they’ve tumbled over. The Corsair H100I has survived, just, and when we say just, its on the edge. If you see yourself as a bit of an Evel Knievel, you’ll probably be pretty happy with a clock at those temps, if we’re completely honest, you can get away with it, not that we’d recommend it , but what is interesting is the temps from the H100I when compared to the 240 and 360 Radiator, 3 coolers which, at the start of the tests, were pretty close, the H100I and 240 Radiator especially. But now, they’re a world apart. The 2 open loop set ups undoubtedly trounce the closed loops here, the 240 loop runs 13°c cooler giving it plenty of room to play with and the 360, the 360 radiator has nearly 20°c to play with! It’s impressive, considering it isn’t a light clock we’ve put it through, that’s a pretty beefy clock considering it’s a 6 core processor that’s churning out those numbers.
In terms of Performance, it’s a no brainer here, the closed loop H100I set up kept up for a while but ended up falling to the open loops when really put to the test, the H80I and H60 never really cut the grade when put next to them. We’re going to award the point of this round to open loops.
Closed loop 4 – Open loop 2
 Now, I can hear you saying, “Well that’s all good, but what does it mean?” The long and short of it, a higher flow rate will give you lower temperatures, providing that no key variable has changed (extra fans, different ambient temps, different length tubing etc). Having said that, a bigger pump will generate more heat, this heat has to go somewhere, it is transferred to the coolant inside the loop, but because of the bigger pump, the coolant can flow much faster, meaning there is less turbulent flow when the fluid is in a vessel (CPU block, pump, and radiator) which is a good thing, fluid gets from A to B to C and back to A much faster, meaning that the fluid is spending less time heating up, keeping the overall temps of the system down. This is something we want to put to the test.
We’re going to compare 2 bits of data we collected earlier, the H100I and the 240mm radiator setup with the front bayres scores on an overclock of 4.7GHz with 1.35 voltage, and see what happens when we swap the front bayres on the 240 for a Lang D5 pump which as a massive 10 times the flow rate of a closed loop solution. To make this fair, again, we have used the exact same set up as we previously used, same components, same thermal paste, same ambient temperature and, for the purpose of the open loop, we’ve used the same tubing in this test. (We’ve had to recreate a loop as our testing rig has been dismantled since so results from earlier tests may vary slightly!)
Now, I can hear you saying, “Well that’s all good, but what does it mean?” The long and short of it, a higher flow rate will give you lower temperatures, providing that no key variable has changed (extra fans, different ambient temps, different length tubing etc). Having said that, a bigger pump will generate more heat, this heat has to go somewhere, it is transferred to the coolant inside the loop, but because of the bigger pump, the coolant can flow much faster, meaning there is less turbulent flow when the fluid is in a vessel (CPU block, pump, and radiator) which is a good thing, fluid gets from A to B to C and back to A much faster, meaning that the fluid is spending less time heating up, keeping the overall temps of the system down. This is something we want to put to the test.
We’re going to compare 2 bits of data we collected earlier, the H100I and the 240mm radiator setup with the front bayres scores on an overclock of 4.7GHz with 1.35 voltage, and see what happens when we swap the front bayres on the 240 for a Lang D5 pump which as a massive 10 times the flow rate of a closed loop solution. To make this fair, again, we have used the exact same set up as we previously used, same components, same thermal paste, same ambient temperature and, for the purpose of the open loop, we’ve used the same tubing in this test. (We’ve had to recreate a loop as our testing rig has been dismantled since so results from earlier tests may vary slightly!)
 Now we have our results. We’ve put it on a pretty beefy clock so we can really see how well it performs and we’ve got to say, we’re fairly impressed by the outcome. When you compare the H100I, a very high end closed loop cooler to an open loop set with a 240mm radiator and a Lang D5, under load, there’s nearly 20°c difference! In terms of overclocking, that’s a lot, especially when you consider that the radiator takes up a similar area. When you compare the flow rates, it isn’t surprising that the D5 comes out on top though; it’s moving up to 20 Litres of fluid per minute, that’s a lot of fluid for such a small pump.
There are ways you can help counteract the temps on a ‘lesser cooler’, adding high flow case fans to the case, ensuring the system is kept clean and a high standard of cable management will all help improve the system, whether it gives current air flow a more direct path or adds to the air flow, it will all help drop the temps a bit, but don’t kid yourself into thinking that you can get that H100I to perform to the levels of the Lang D5 and custom 240 Radiator setup, you can help close the gap a bit, but they won’t become equals.
This section’s a complete no brainer, custom open loops run away with it here, when your CPU is put to the sword, the temps are kept a lot lower.
Closed loops 4 – Open loops – 3
Now we have our results. We’ve put it on a pretty beefy clock so we can really see how well it performs and we’ve got to say, we’re fairly impressed by the outcome. When you compare the H100I, a very high end closed loop cooler to an open loop set with a 240mm radiator and a Lang D5, under load, there’s nearly 20°c difference! In terms of overclocking, that’s a lot, especially when you consider that the radiator takes up a similar area. When you compare the flow rates, it isn’t surprising that the D5 comes out on top though; it’s moving up to 20 Litres of fluid per minute, that’s a lot of fluid for such a small pump.
There are ways you can help counteract the temps on a ‘lesser cooler’, adding high flow case fans to the case, ensuring the system is kept clean and a high standard of cable management will all help improve the system, whether it gives current air flow a more direct path or adds to the air flow, it will all help drop the temps a bit, but don’t kid yourself into thinking that you can get that H100I to perform to the levels of the Lang D5 and custom 240 Radiator setup, you can help close the gap a bit, but they won’t become equals.
This section’s a complete no brainer, custom open loops run away with it here, when your CPU is put to the sword, the temps are kept a lot lower.
Closed loops 4 – Open loops – 3
 A big drawback though, if you have two or more graphics cards and want them both closed loop water cooled, you need two separate loops, this can be a real pain. There are cases out there that can be compatible with this, but then, there are a lot that won’t be able to do this. This is also going to add noise to the system, as you’ll need to double your fans and pumps to accommodate for the 2nd radiator.
Now let’s compare this to open loops. I’m not going to lie, they can be a right pig to submerge. The water block for a graphics card isn’t the easiest thing in the world to fit, its something that, like everything with open loops, you have to get 100% correct, if you’re 1% out, its either going to either leak or not sufficiently cool the graphics card resulting in a failed graphics card.
A big drawback though, if you have two or more graphics cards and want them both closed loop water cooled, you need two separate loops, this can be a real pain. There are cases out there that can be compatible with this, but then, there are a lot that won’t be able to do this. This is also going to add noise to the system, as you’ll need to double your fans and pumps to accommodate for the 2nd radiator.
Now let’s compare this to open loops. I’m not going to lie, they can be a right pig to submerge. The water block for a graphics card isn’t the easiest thing in the world to fit, its something that, like everything with open loops, you have to get 100% correct, if you’re 1% out, its either going to either leak or not sufficiently cool the graphics card resulting in a failed graphics card.
 That being said, open loops will go completely the opposite of a closed loop GPU, firstly, it is customizable, if you have dual, tri or quad SLI or Crossfire in your system, you can cool all the cards, you just need a separate block for each. The customization comes into play here, between each card you can decide whether you want to individually tube one card to the next (fiddly but looks better in our opinion) or you can go for a bit of an easier and certainly quicker route, and fit a bridge that connects one card to the next. Customization is a big thing here, if you decide to go for a blue theme in your system, you can use blue fluid which, in some blocks, you can see the fluid as it passes through the GPU or you can use blue tubing between each card to help add to the chosen look.
Provided you manage to get yourself the right block, open loop GPUs look a lot nicer than a closed loop solution/bracket. It looks like it’s meant to fit as opposed to the bracket solution and performance wise a proper custom water block runs away with it. We are also wary of fitting the closed loop brackets as things like the VRAM don’t really get properly cooled.
Closed loops 4 – Open loops 4
That being said, open loops will go completely the opposite of a closed loop GPU, firstly, it is customizable, if you have dual, tri or quad SLI or Crossfire in your system, you can cool all the cards, you just need a separate block for each. The customization comes into play here, between each card you can decide whether you want to individually tube one card to the next (fiddly but looks better in our opinion) or you can go for a bit of an easier and certainly quicker route, and fit a bridge that connects one card to the next. Customization is a big thing here, if you decide to go for a blue theme in your system, you can use blue fluid which, in some blocks, you can see the fluid as it passes through the GPU or you can use blue tubing between each card to help add to the chosen look.
Provided you manage to get yourself the right block, open loop GPUs look a lot nicer than a closed loop solution/bracket. It looks like it’s meant to fit as opposed to the bracket solution and performance wise a proper custom water block runs away with it. We are also wary of fitting the closed loop brackets as things like the VRAM don’t really get properly cooled.
Closed loops 4 – Open loops 4