What is a BIOS?
A BIOS, which stands for Basic Input/Output System, is a program located on a chip on your motherboard that handles hardware initialisation whilst the system is booting. It allows you to modify certain settings and aspects of your system at the lowest level. The BIOS will also handle any services and data between an operating system and connected hardware devices on boot, such as a storage device. The BIOS is vital to the systems operation and its communication with all of your hardware.
If you have a modern system, it'll likely have a "UEFI" which stands for Unified Extensible Firmware Interface, which superseded BIOS, however, UEFI is still generally referred to as the BIOS or UEFI BIOS, to stem confusion between the two. UEFI aimed to resolve a lot of the limitations that came with BIOS due to its age.
This guide will show you how to do a few different key things within your computers BIOS. Including loading your UKGC BIOS profile, or enabling XMP/D.O.C.P to hit your memory's rated speeds.
Loading a BIOS profile
You may find yourself in a situation where some pre-saved BIOS settings need to be re-loaded. This could be because the BIOS has been reset back to factory defaults for diagnosing an issue, or they've reset due to a dead BIOS battery.
On all UKGC systems from August 2020 onwards, your pre-configured BIOS settings are saved in a profile providing the motherboard supports this feature.
Step 1 - Loading into the BIOS
To load into the BIOS (following a successful POST) either continuously tap or hold the Delete (Del) key on your keyboard whilst the computer is turning on. If done successfully you should see something similar to the image below.
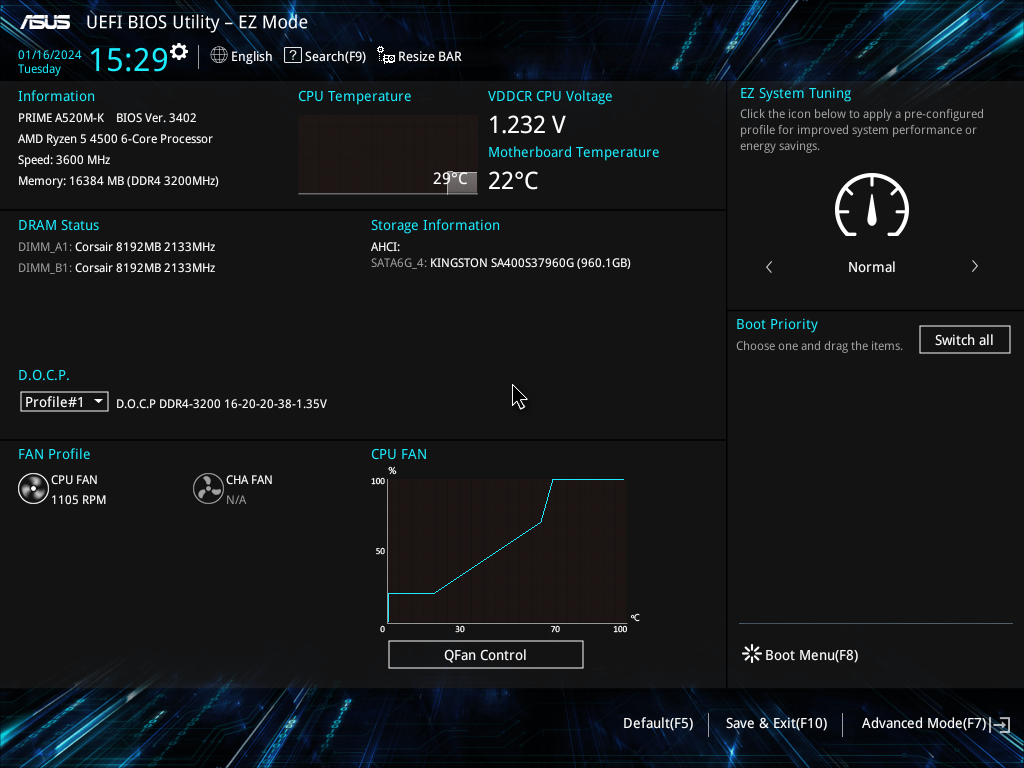
By default, you'll likely be in "EZ Mode", from this page you can see a lot of information including the recognised system motherboard, CPU, RAM and RAM speed, fan RPM, CPU temperature, any storage devices and bootable drives.
Step 2 - Navigate to ASUS User Profile's
In order to load a BIOS profile, we'll need to switch to "Advanced Mode", to do this, press the F7 key on your keyboard to switch modes, this should happen instantly and you'll be presented with the screen below.

Now from here, either using your mouse or arrow keys on the keyboard, navigate to the "Tool" tab at the end of the horizontal menu, which looks like this:
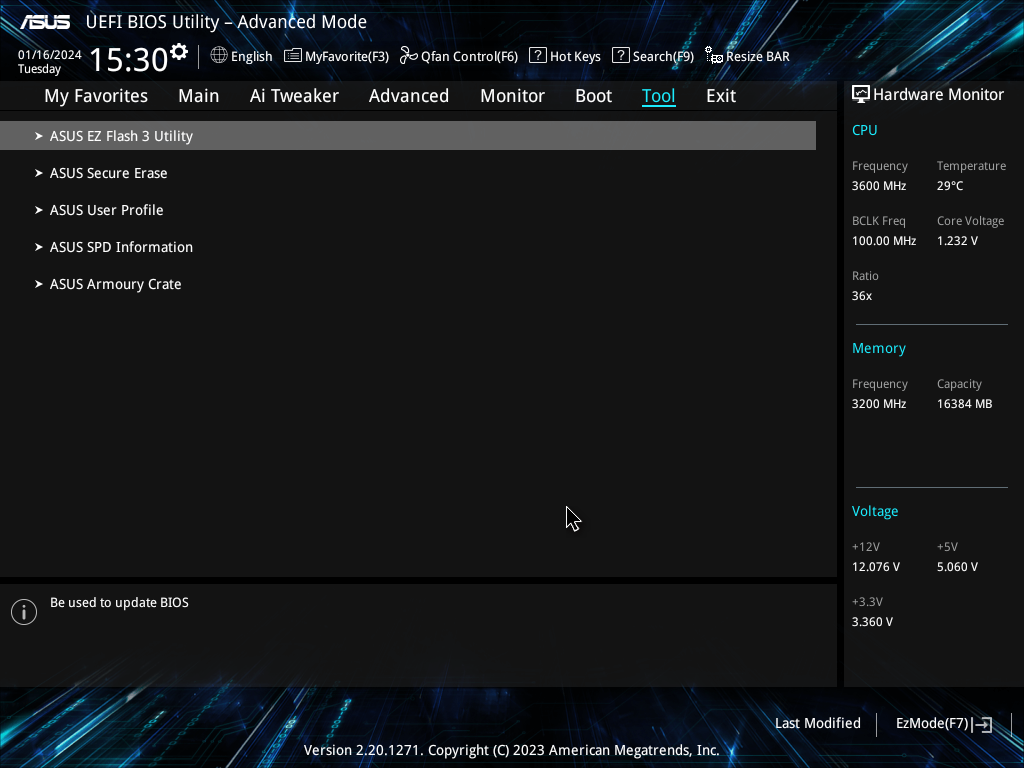
The BIOS profiles will be saved in the "ASUS User Profile" option so again using either your mouse or arrow keys, navigate to the "ASUS User Profile" tab and click/press enter on it. Depending on your model of motherboard this may also be called "ASUS Overclocking Profile".
Step 3 - Loading a saved profile
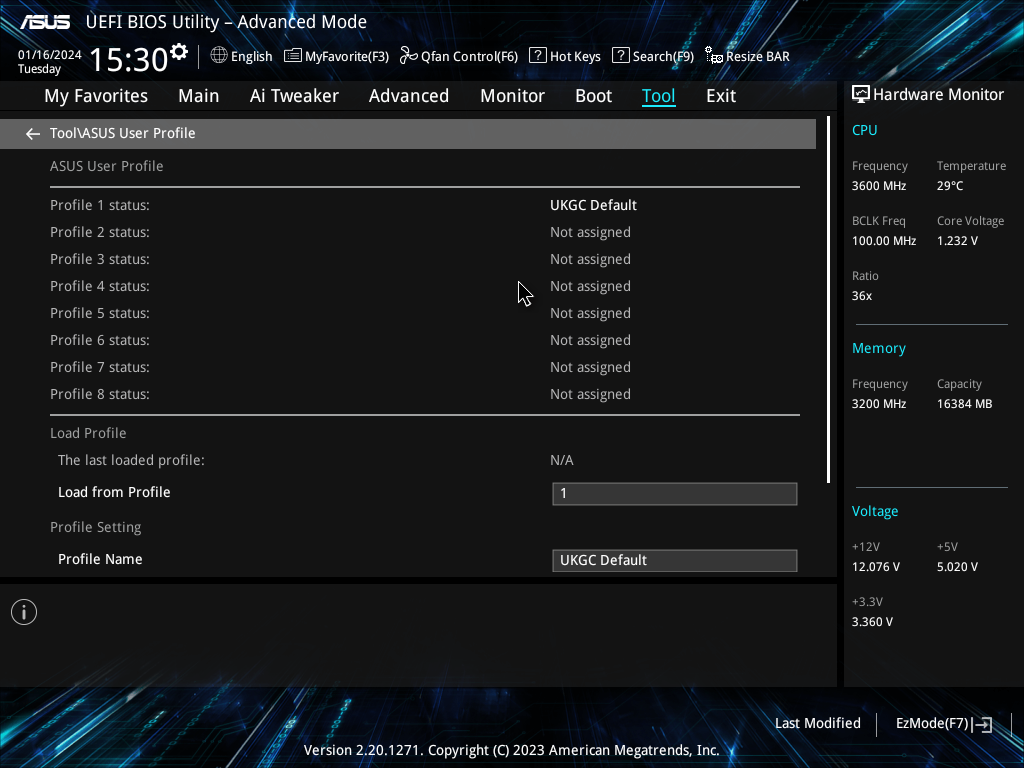
Now that we are in the ASUS User Profile tab, you'll be presented with a list. If you still have actively saved profiles that can be loaded, you'll see them here.
We save all of our profiles as "UKGC Default", if you purchased an overclock directly from us you may have a second profile called "UKGC OC", this will include any important settings changed in the default profile, but have your CPU clock speeds and voltages modified for your CPU overclock as well. If you're diagnosing an issue with system crashing you feel is linked to an overclock, we recommend using the "UKGC Default" profile, as you can always revert it with "UKGC OC" at a later date.
To load a profile, navigate to the "Load from Profile" box, by default this will be set to "1", you can type any number you'd like which corresponds to the list above, for "UKGC Default", this will be "1".
Press enter/click on this box.
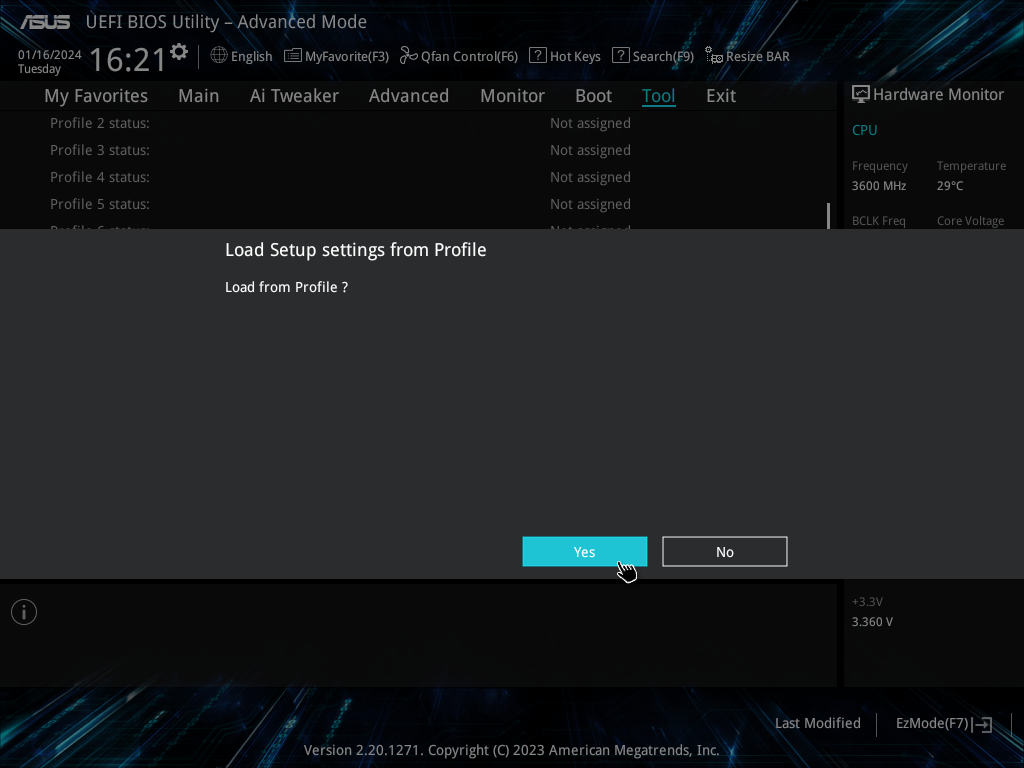
You'll be asked to confirm the profile being loaded which is shown below. Click/press enter on yes.
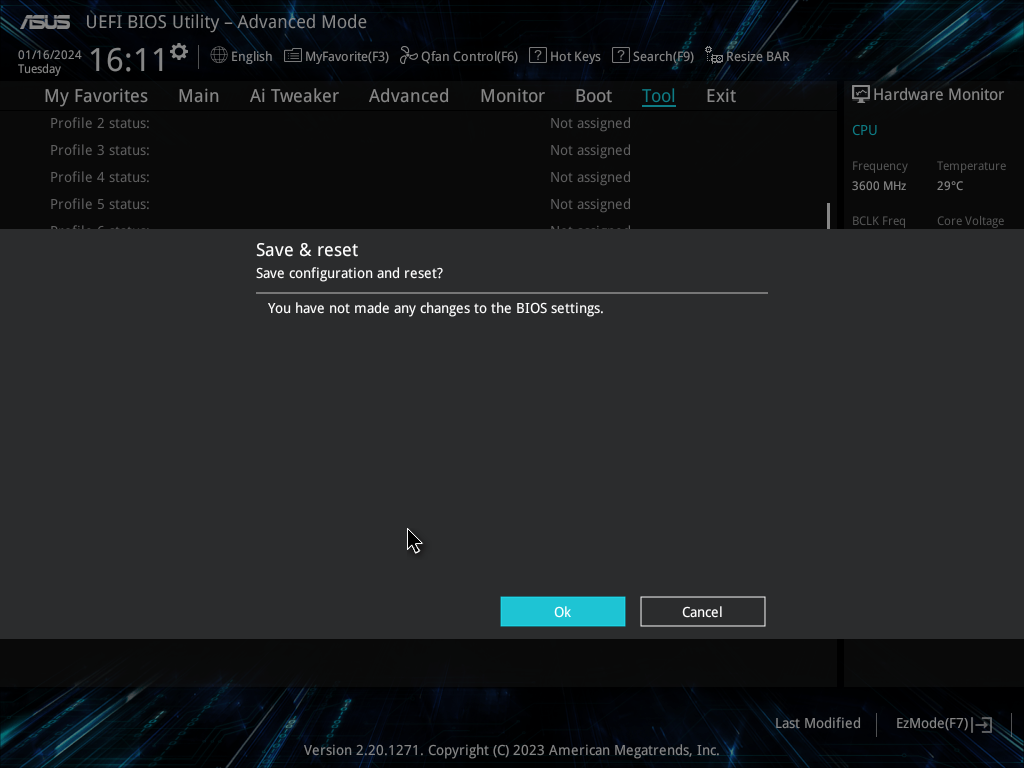
Step 4 - Saving and Exiting
Your profile is now loaded! Now to simply save the changes made and exit the BIOS, press the "F10" key on your keyboard, a pop up will show the changes being made, if any, and again ask you to confirm before exiting, simply click/press enter on yes and you're done!
Useful Feature - BIOS Search
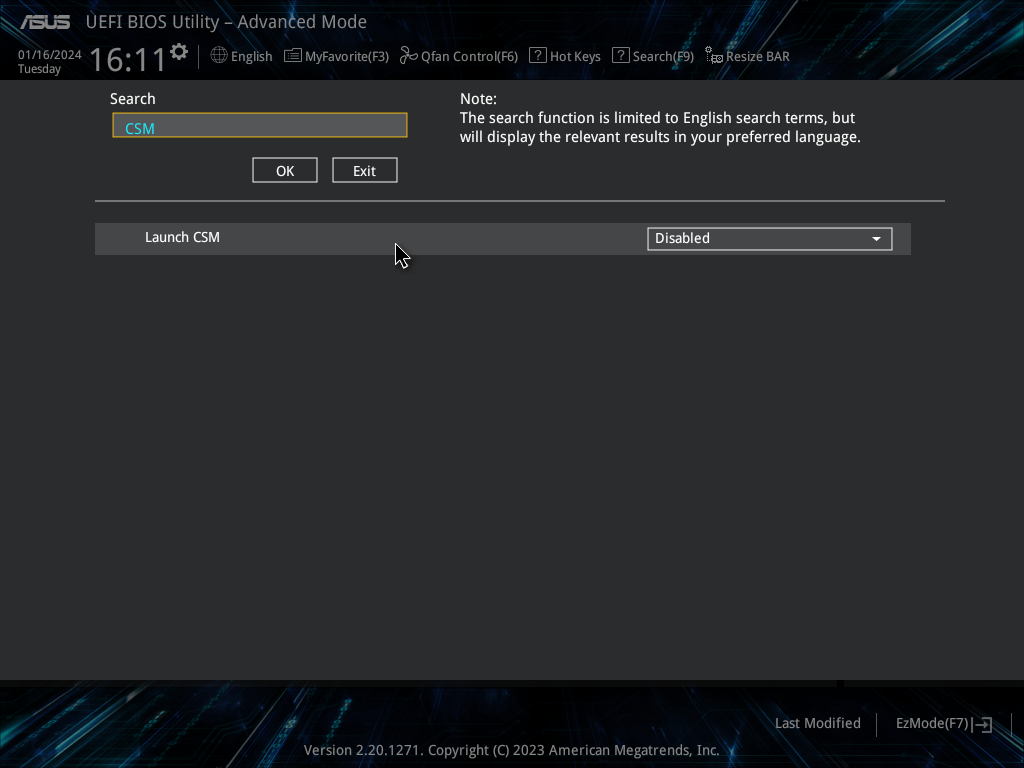
If you are struggling to find any of the settings mentioned, some ASUS UEFI BIOS' have a search feature so you can find exactly what you are looking for. You can also modify the settings within the search functionality itself.
Below is an example of using the search box to find the "CSM" combability setting. To use the Search menu, press the "F9" key on your keyboard, which will bring up the window shown below.
BIOS XMP/D.O.C.P
If you don't have a BIOS profile saved or due to a BIOS update, you are unable to load it, this section will tell you the most important things to change manually.
First and foremost is XMP or D.O.C.P, XMP stands for "Extreme Memory Profiles" and D.O.C.P stands for "Direct Overclocking Profile". If you have an Intel based system, your setting will likely be called XMP, and for AMD users, it'll be D.O.C.P, but both achieve the same goal.
Your memory (RAM) has a factory rated overclock to it's operating speed, for instance, you may have a RAM kit that is "3000 Mhz", this will not be it's default speed and is actually a certified factory overclock. No matter what kit you have, with DDR4 memory, the default speed will likely be 2133 Mhz and 4800 Mhz for DDR5, in order to unlock the full potential of your RAM, we need to enable XMP/D.O.C.P to hit those higher speeds. This can be a matter of performance, especially on the side of AMD for Ryzen 3000 and 5000.
How to enable XMP/D.O.C.P
Navigate to the Advanced mode by pressing the "F7" key on your keyboard, and then navigate to the AI Tweaker tab as shown below.
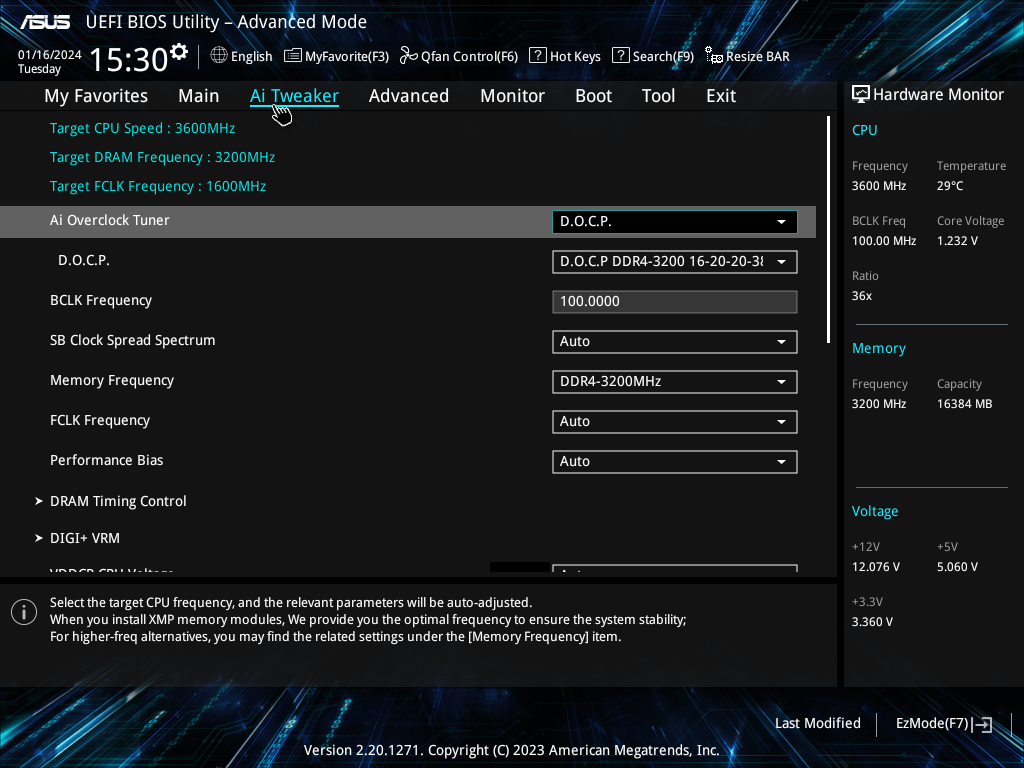
The XMP/D.O.C.P drop down setting will likely be the first option in the list here. In this case we'll be changing the "Ai Overclock Tuner" setting from "Auto", to either XMP II or D.O.C.P. This will change various different settings in order to have the correct timings/speed, so do not worry if there is a long list of modifications when you save and exit.
Save & Exit
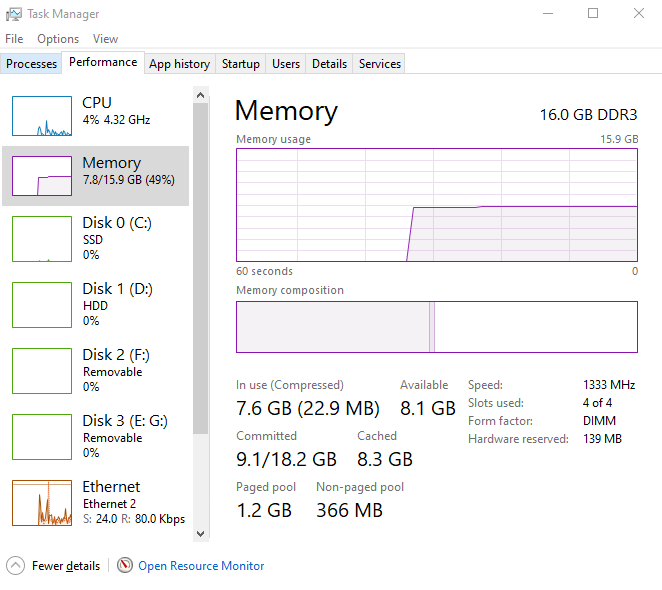
Once this setting is changed, to save and exit the BIOS, press the "F10" key on your keyboard and accept the changes being made. Your system will then restart, you can verify these changes have been made by checking the "Task Manager" in Windows, which will show your current RAM speed.
If after enabling this setting your system runs into issues or fails to POST until going into Safe Mode, your RAM or motherboard may be experiencing a fault, this does not guarantee a hardware failure but it may be worth performing a memory test on your RAM to see if it has any errors. This is effectively an overclock to memory so it is just a simple toggle, and won't be faultless 100% of the time. You can check out are article on how to test RAM here.
Further help
If you need further guidance on some specific BIOS settings such as those required for Windows 11, or how to update the BIOS, you can check out are articles for Windows 11 Preparation & How to update the BIOS on an ASUS motherboard.
The BIOS shouldn't need much tinkering and configuring, it should be noted that performing any changes to the BIOS without knowledge on what they do could cause problems with your system, so we'd recommend following a step by step guide such as this one, or contacting us for further assistance if required.